Other Builds · Real build

DIY Chicken Coop and Run: a 4×6 ft Coop Built for a School

A small, sturdy chicken coop with an attached run, designed so that school children can collect eggs and clean it safely. It stands on concrete blocks near the coast, so it was built to cope with wind, damp and salt air.

Built and documented by Team Los Pollos Hermanos, engineering students at Cal Poly Humboldt. Originally published on Appropedia: “Redwood Coast Montessori chicken coop” under CC BY-SA 4.0.
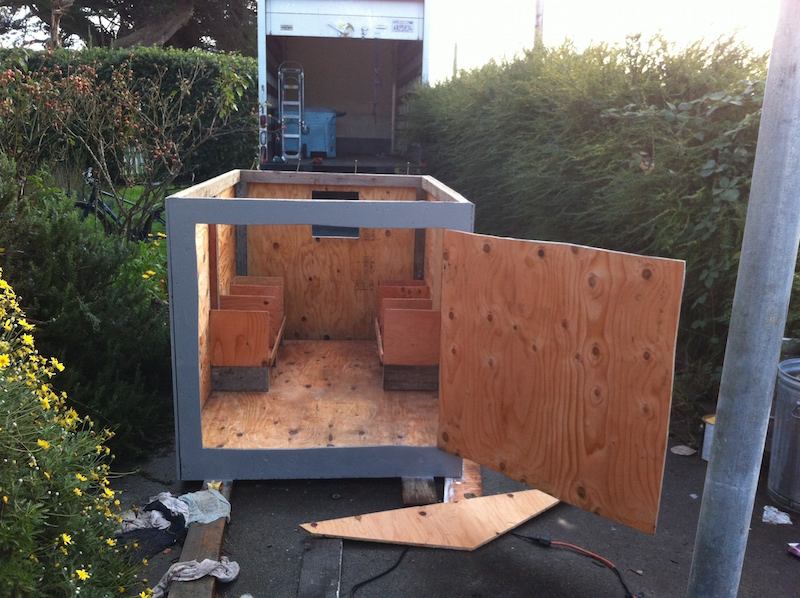
The hinged back door that opens the rear wall for cleaning, during construction
The hinged back door that opens the rear wall for cleaning, during construction. Photo: Jme241, Public domain, via Appropedia

The story behind this build

A team of first-year engineering students built this coop for a Montessori school next to the sand dunes near Arcata, California, as part of an introductory design course. The school wanted to keep chickens so the children could learn to look after animals.

The team set clear rules for the design before they started: it had to be safe for children, protect the birds from weather and predators, survive the coastal climate, be possible to move, be easy to clean and stay within a budget of $400 (donations kept the actual spending under that). They spent about 300 hours in total on design, meetings and building.

How it is designed

  • The coop is a simple box, 4 × 6 ft and 4 ft high, framed with 2×2 lumber. Walls and floor are outdoor-grade plywood sheets.
  • It stands on four concrete blocks, one at each corner, which keeps the floor off the damp ground.
  • Two closable vents, 6 × 12 in, sit high up at the top corners of the side walls.
  • The chickens go in and out through a 1 × 2 ft door in the front.
  • Three nest boxes on each side open from the outside through doors hinged at the top. One locking bar across each row of doors secures all three at once, instead of a lock on every door.
  • Two roosting bars at different heights sit in U-shaped holders, so they lift out for cleaning.
  • The whole back wall is a lockable hinged door, which makes cleaning out the coop easy.
  • The gable roof is about a foot tall, built from the same panels and covered with roofing paper and corrugated metal.
  • The run is 5 × 10 ft and 4 ft high, framed with 2×2s and wrapped in chicken wire with 1 in openings. The wire continues a foot below ground so predators cannot dig under it, and a 6 in flap of wire is screwed down over the coop to close the gap between run and coop. People get in through an 18 in × 5 ft door.

Materials they used

  • CDX plywood sheets, 4 × 8 ft: six ½ in and one ¾ in
  • Lumber for the 2×2 framing (about ten lengths, donated)
  • Corrugated tin panels (3) and a roll of roofing paper for the roof
  • Chicken wire, 250 ft roll, 1 in openings
  • Metal hinges (8) and locks (4)
  • Deck screws (5 boxes)
  • Beeswax and olive oil sealant for the wood
  • A reused metal road sign and cutting discs (both listed in the builders' materials)
  • Four concrete blocks to stand the coop on

How they built it

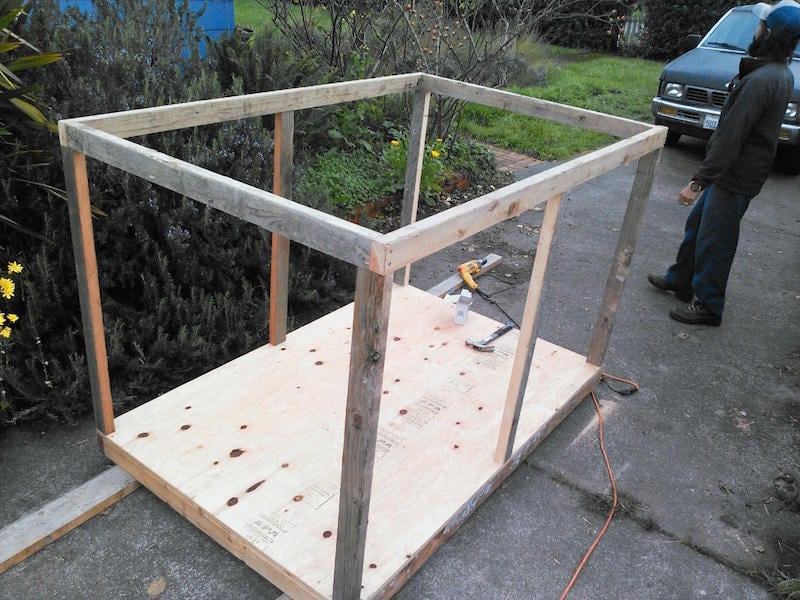
  1. 1Frame the floor and walls

    The team built the floor frame from 2×2 lumber, screwed plywood on top and raised the corner posts and wall framing to make a 4 × 6 ft box, 4 ft high.

  2. 2Build the nest boxes and back door

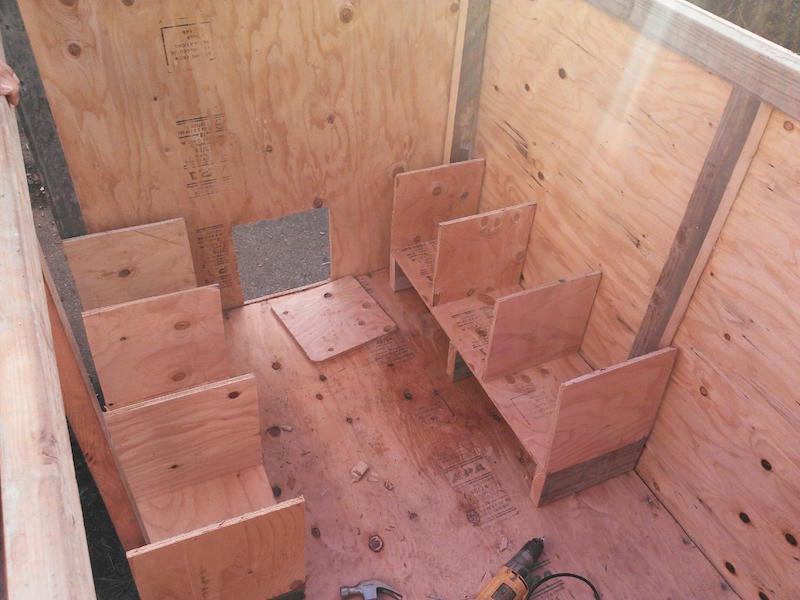
    Inside, plywood dividers make three nest boxes along each side. Each row got an outside door hinged at the top, and the back wall was built as a full-width hinged door for cleaning.

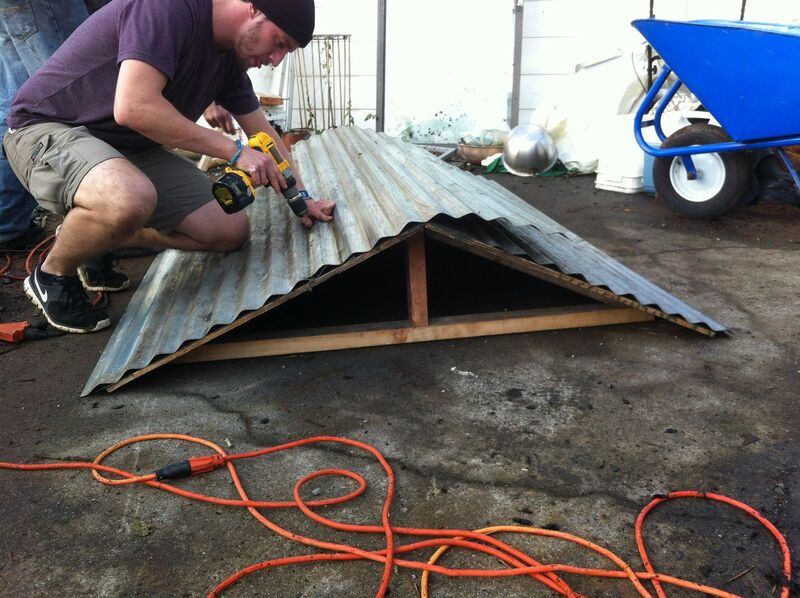
  3. 3Build the roof separately

    The gable roof was framed on the ground, covered and clad with corrugated metal, then lifted onto the coop.

  4. 4Set the coop on blocks

    The finished coop was placed on four concrete blocks so the floor stays dry and air can move underneath.

  5. 5Build and attach the run

    A 5 × 10 ft frame of 2×2s was wrapped in chicken wire, with the wire buried a foot into the ground around the edge. The run was joined to the coop by laying a flap of wire over it and screwing a strip of wood on top.
More photos

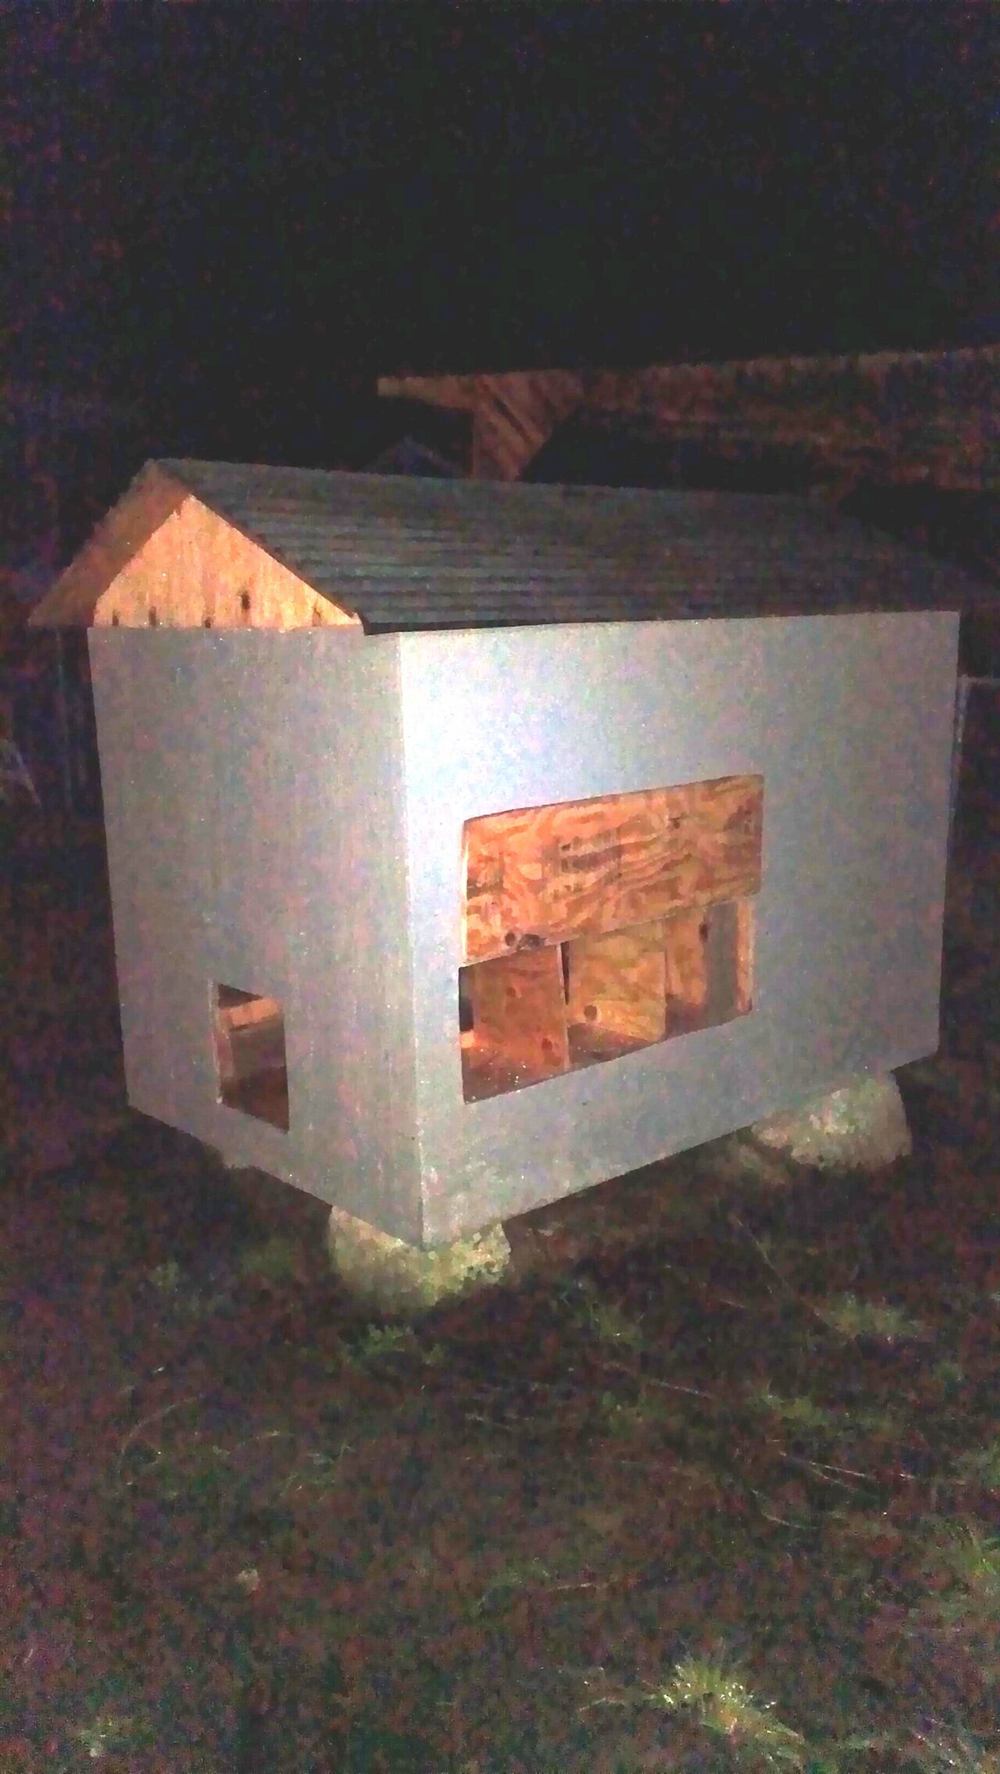
The coop near completion, photographed during the build
The coop near completion, photographed during the build. Photo: Jme241, Public domain, via Appropedia
Nest box dividers inside the coop, during construction
Nest box dividers inside the coop, during construction. Photo: Jme241, Public domain, via Appropedia
The gable roof, built separately and clad with corrugated metal
The gable roof, built separately and clad with corrugated metal. Photo: Kathy Nativi, Public domain, via Appropedia
The 2×2 frame on its plywood floor
The 2×2 frame on its plywood floor. Photo: Jme241, Public domain, via Appropedia

Use and upkeep, from the builders

  • Collecting eggs: unlock the bar, open one nest door at a time and close it again before opening the next. If a hen is sitting in a nest, leave her and try the next door.
  • Chickens may try to jump out when a door opens, so be ready before you open it.
  • Keep the keys for the nest bar and the back door in one agreed place, since children use the coop.

Our notes if you build one

  • Chicken wire keeps chickens in, but determined predators such as raccoons and foxes can tear it. Many keepers use welded wire mesh (hardware cloth) at least on the lower part of the run.
  • Burying the wire, as this team did, is one of the most effective ways to stop digging predators.
  • Check local rules before keeping chickens; some towns limit numbers or ban roosters.

Credits and license: Built and documented by Team Los Pollos Hermanos, engineering students at Cal Poly Humboldt. Originally published on Appropedia: “Redwood Coast Montessori chicken coop” under CC BY-SA 4.0. This page is our summary of their documentation and is shared under the same license (CC BY-SA 4.0); photos are credited individually. Measurements and costs are the builders' own and refer to their site and year. DIY Outdoor Builds did not build this project.

Building work can be dangerous and may need a permit. Check local rules and use a qualified professional for electrical, gas and structural work.

Built something like this?

Share your own version with your photos, measurements and what you changed.
Share your build

Step-by-step guides for similar projects

All guides

More real builds

All builds