 Guide
Wooden Decks
A walkway made of reclaimed wooden pallets laid end to end on a bed of bark, so people on foot, with wheelbarrows or using mobility aids can cross muddy, uneven ground. The pallets can be lifted and moved when the farm changes.
Built and documented by Team The Mooos (page by Ella Owen), engineering students at Cal Poly Humboldt. Originally published on Appropedia: “CASA Student Farm accessible pathways” under CC BY-SA 4.0.
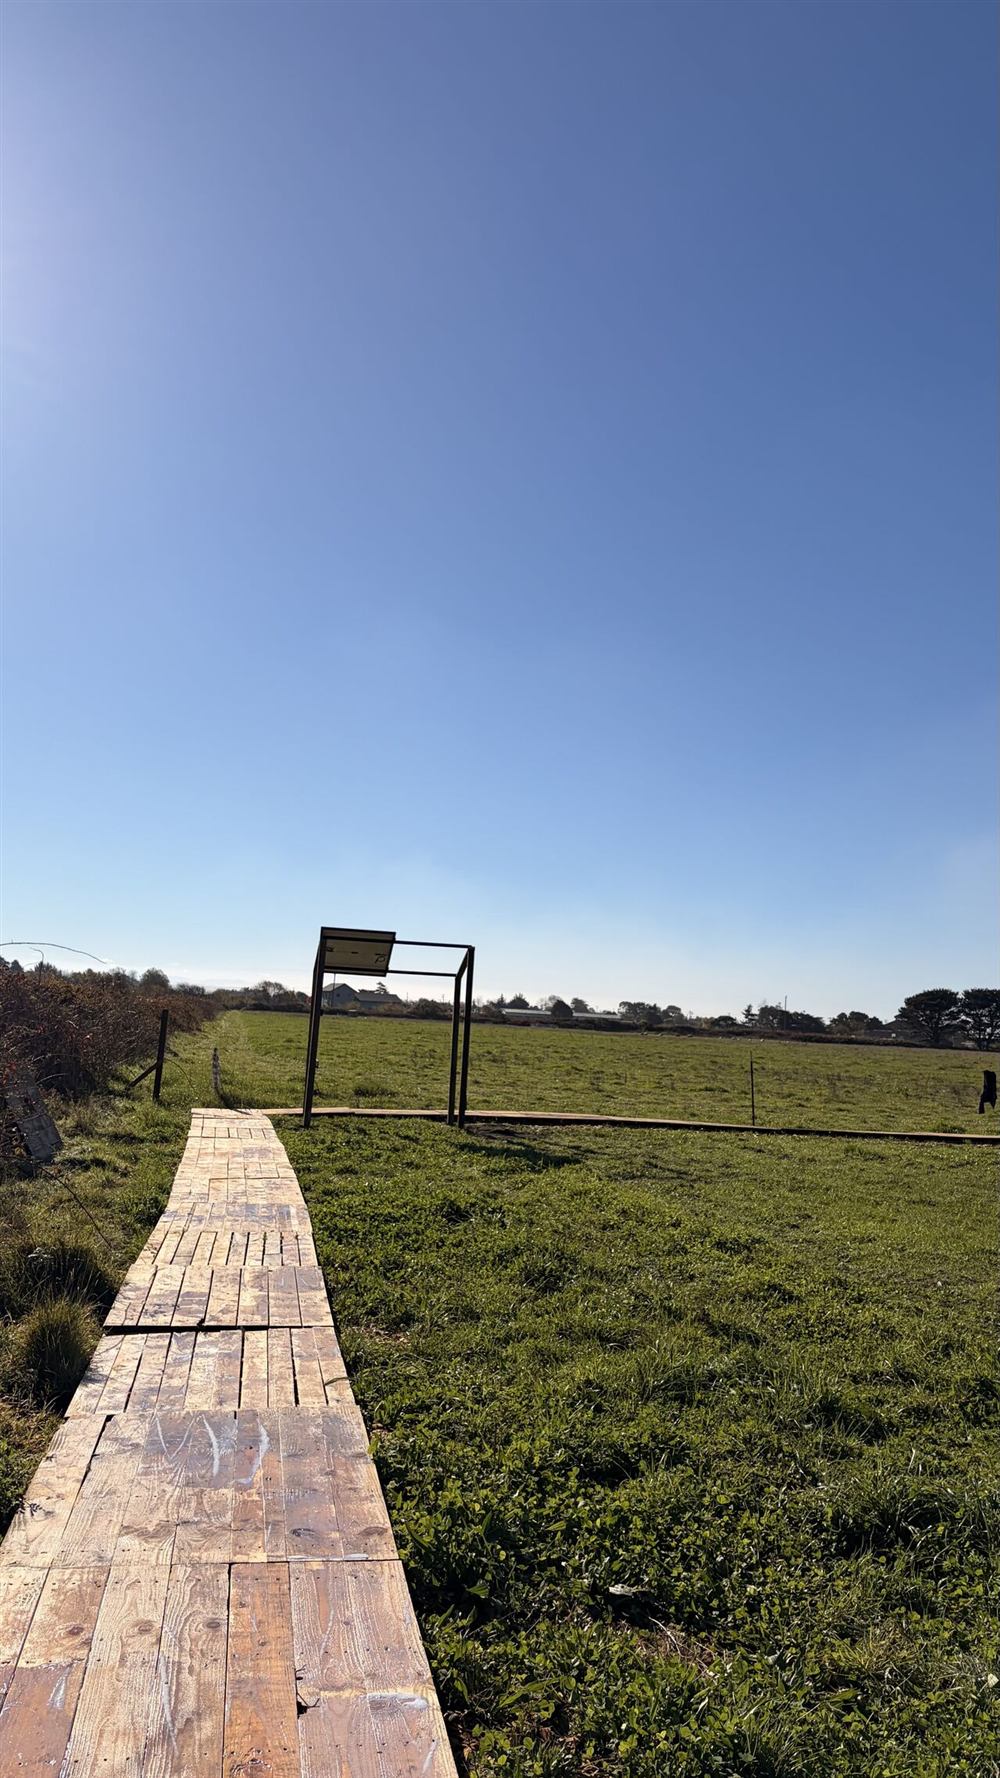
The new student farm sits on soft ground that turns muddy in the rain, which made it hard to get around, especially for visitors using wheelchairs or other mobility aids. The farm wanted a path that was inclusive, low-cost and easy to change as the farm grows.
The team built a path of pallet tiles following the natural lines of the land. Round pallet pieces at the corners let the path change direction in a zig-zag, a nod to the farm's wish for a design inspired by flowing water.
Mark the route with flags, clear sticks, rocks and leaves, then scrape and level the soil with shovels, rakes and a hand tamper. Look for low spots where puddles will form and fill them.
Spread 1 to 2 inches of bark or wood chips along the route and rake it even. Step on it to check it compresses evenly without showing bare soil, and add more where it sinks.
Choose sturdy pallets, replace damaged boards, remove the bottom boards so they cannot rot, sand the top surface smooth and seal the wood.
Add extra supports underneath where needed, screw down any loose slats and make sure every nail is removed or driven fully in.
Set each pallet on the bark, adjusting the bark underneath until the surface is level and does not shift under weight. Butt the pallets close together and join them with 4 inch wooden blocks.
Walk the whole path to find wobbly or uneven spots and pack more bark under them. Pour water on the path to check that it drains away.
Credits and license: Built and documented by Team The Mooos (page by Ella Owen), engineering students at Cal Poly Humboldt. Originally published on Appropedia: “CASA Student Farm accessible pathways” under CC BY-SA 4.0. This page is our summary of their documentation and is shared under the same license (CC BY-SA 4.0); photos are credited individually. Measurements and costs are the builders' own and refer to their site and year. DIY Outdoor Builds did not build this project.
Building work can be dangerous and may need a permit. Check local rules and use a qualified professional for electrical, gas and structural work.
Share your own version with your photos, measurements and what you changed.
 Real build
Other Builds
 Real build
Outdoor Structures
 Real build
Raised Garden Beds
 Real build
Pergolas & Gazebos