 Guide
Storage Solutions
Storage Solutions · Real build
A freestanding rack that holds long-handled tools upright in three lanes: one for shovels, one for rakes and one for hoes. The builders compare it to a vending machine: take the tool at the front and the next one is right behind it.
Built and documented by Team NoVowels: Valeria Valle, Gabriel Gore, Paxton Dold and Leo Klopf, engineering students at Cal Poly Humboldt. Originally published on Appropedia: “CASA Student Farm modular storage” under CC BY-SA 4.0.
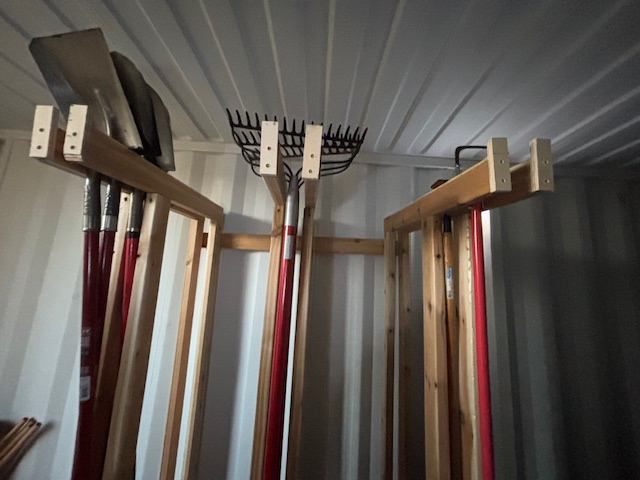
A growing student farm kept all its tools in a shipping container, and the existing storage could not keep up. Four students were asked to make better use of the container's space.
They started with a 1:12 scale cardboard model of the whole container to plan the layout, then a 1:6 model of the tool shelf, and got both approved by the farm before cutting any wood. The final result is a simple rack that stands on the floor and needs no fixing to the container walls.
The team judged their ideas against six criteria set with the farm. The most important was that it had to work well as storage; next came capacity, so it could hold as many tools as the farm needs; then that it was modular and could be reused or rearranged; weather safety, since the container is on an exposed farm; that any student could use it without instructions; and finally that it used sustainable materials. A plain wooden rack built from donated lumber scored well on almost all of them, and it can be taken apart and rebuilt if the farm reorganises the container.
The team cut the twelve boards into four pieces of 4 ft, six pieces of 6 ft and six pieces of 8 ft.
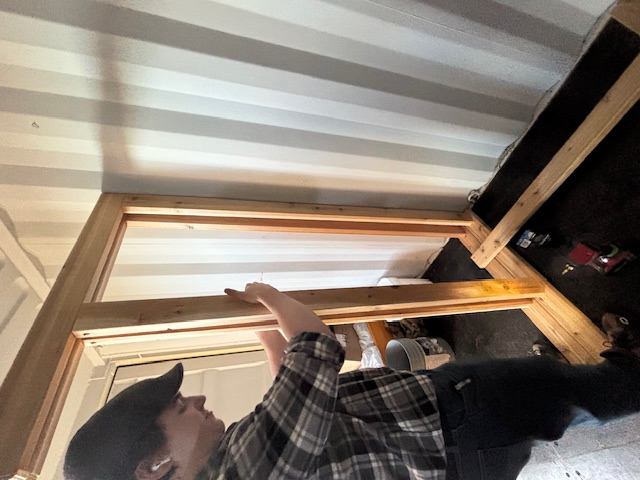
The 6 ft and 8 ft pieces were screwed together into six hollow rectangular frames, each with an 18 inch overhang, before everything was taken to the farm.
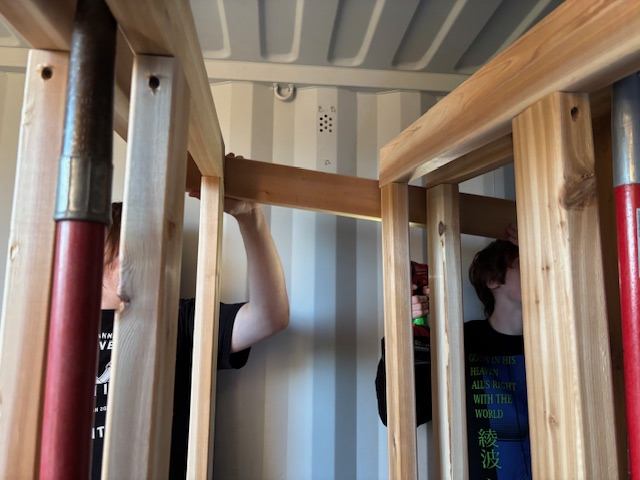
At the farm, two frames were lined up and held in position with a 4 ft piece, then screwed together. The other four frames were added the same way to form the base and the lanes.
Two more 4 ft pieces were screwed across the back and one across the front to stiffen the rack and keep the tools in their lanes.
Credits and license: Built and documented by Team NoVowels: Valeria Valle, Gabriel Gore, Paxton Dold and Leo Klopf, engineering students at Cal Poly Humboldt. Originally published on Appropedia: “CASA Student Farm modular storage” under CC BY-SA 4.0. This page is our summary of their documentation and is shared under the same license (CC BY-SA 4.0); photos are credited individually. Measurements and costs are the builders' own and refer to their site and year. DIY Outdoor Builds did not build this project.
Building work can be dangerous and may need a permit. Check local rules and use a qualified professional for electrical, gas and structural work.
Share your own version with your photos, measurements and what you changed.
 Real build
Other Builds
 Real build
Patios & Paths
 Real build
Outdoor Structures
 Real build
Raised Garden Beds