 Our design
Outdoor Furniture
Our designDesigned by DIY Outdoor Builds and checked board by board in a 3D model built from real lumber sizes. We have not built this one yet, so measure as you go.
A comfortable three-seat garden bench with a back that leans back 15°, built only from 2×4s. Each back post is bolted to the outside of a rear leg, so there are no complicated joints, and the one angle you cut is the same at both ends.
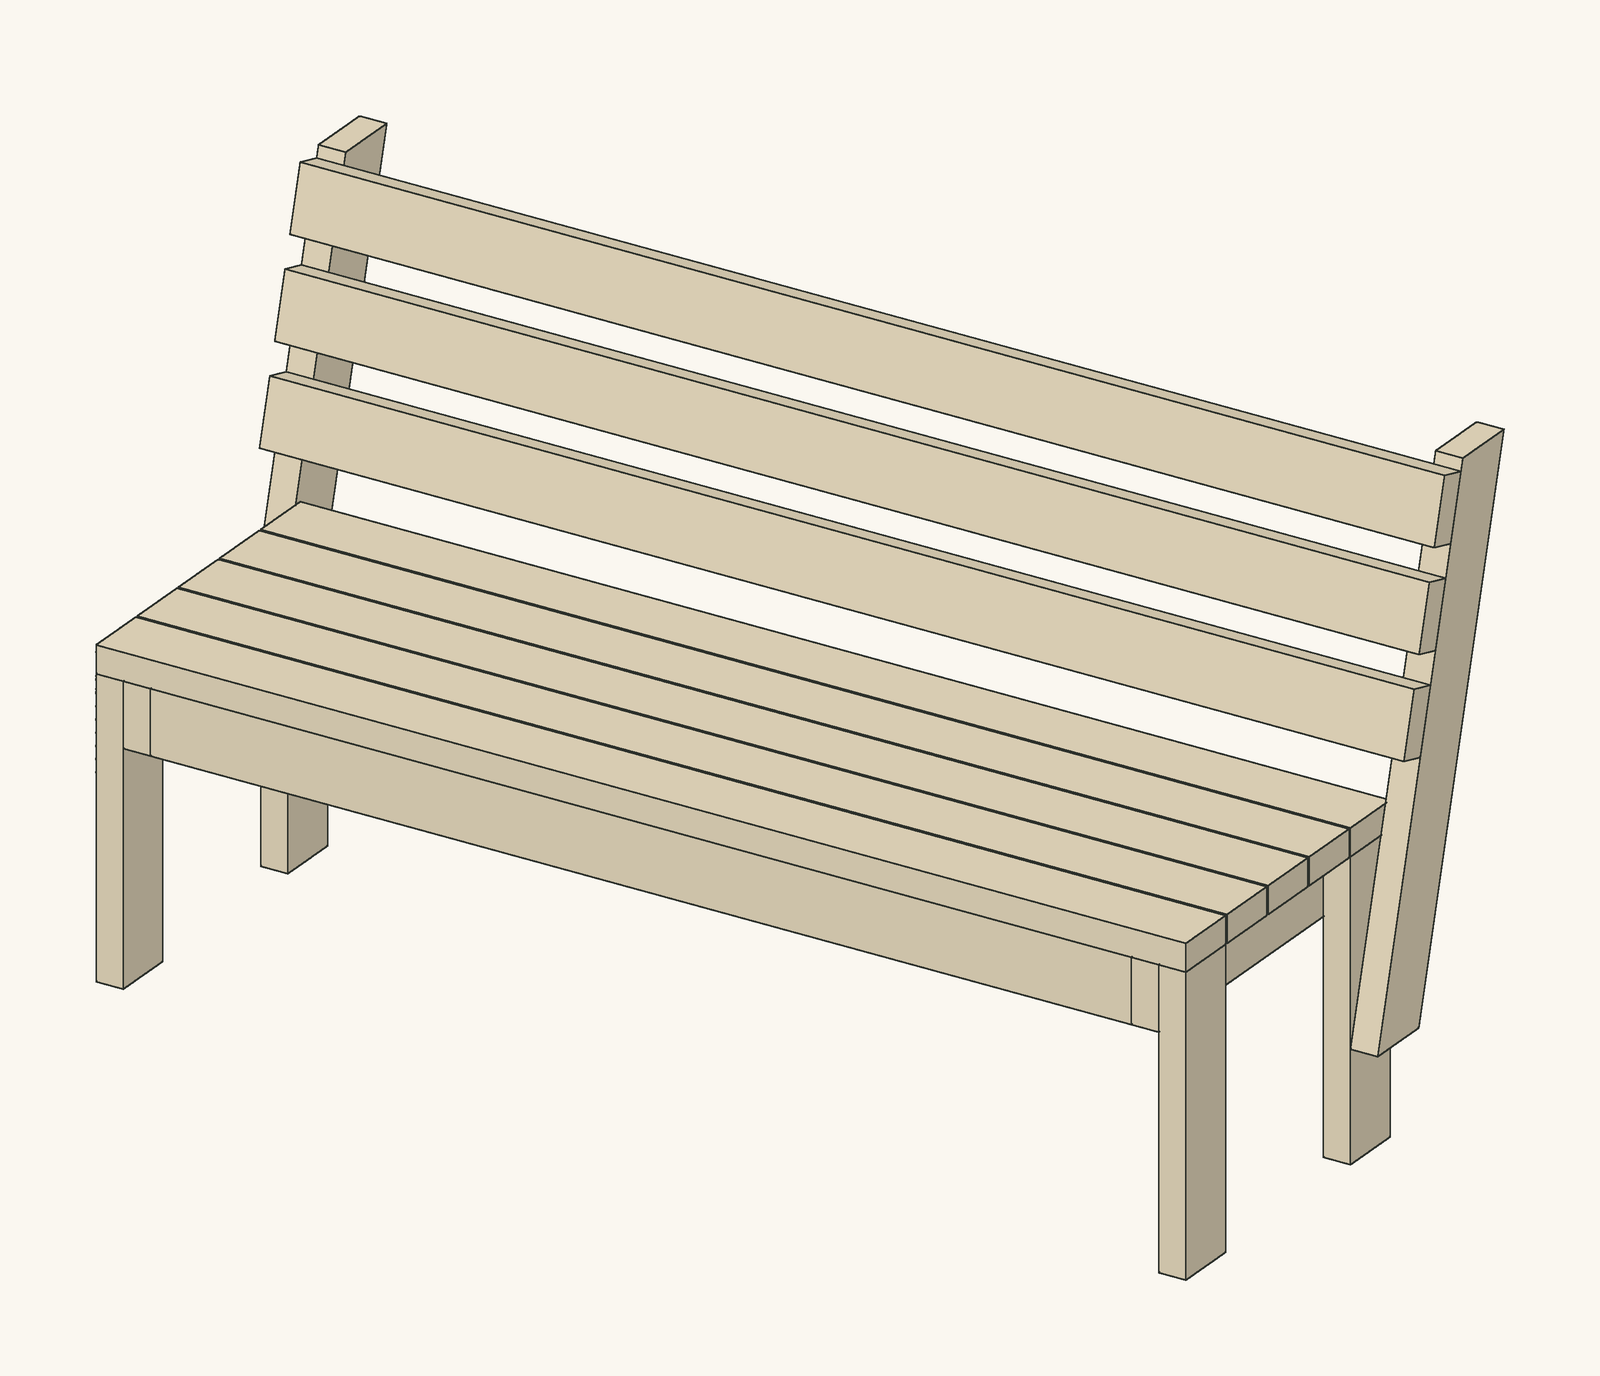
A bench with an upright back is not much more comfortable than one without. This one leans its back 15° from vertical, which with the flat seat gives an angle of about 105° between seat and back: relaxed enough to sit for a while, upright enough to get out of easily. The seat is 17½ in (44 cm) high and 18 in (46 cm) deep, the usual sizes for an outdoor bench.
The bench is two simple side frames joined by aprons. Each side frame is a front leg, a rear leg and a side rail under the seat. A front and a back apron and a centre support carry five seat slats. The back posts are separate 2×4s, cut level at 15° at both ends and bolted to the outside of the rear legs with two carriage bolts each, so the back is as strong as the frame. Three back slats lie on the front faces of the posts.
We modelled the bench board by board in 3D and checked that no two boards overlap, that every board is fixed to another, and that the back slats lie flat on the leaning posts. We have not built this exact bench yet, so clamp a back post in place and sit on the bench before you drill the bolt holes.
| Item | Qty | Notes |
|---|---|---|
| 2×4 boards, 12 ft (3.6 m), pressure-treated or cedar | 6 | Exactly what the cutting diagram uses; the 63 in back slats need 12 ft boards |
| Carriage bolts ⅜ × 4 in (M10 × 100 mm) with washers and nuts | 4 | Two through each back post and rear leg |
| Exterior screws 3 in (76 mm) | About 100 | Frame, seat and back slats |
| Part | Qty | Length | Section | Notes |
|---|---|---|---|---|
| A · Leg | 4 | 16 in (406 mm) | 2×4 (1½ × 3½ in / 38 × 89 mm) | Pressure-treated or cedar |
| B · Side seat rail | 2 | 18 in (457 mm) | 2×4 (1½ × 3½ in / 38 × 89 mm) | Pressure-treated or cedar |
| C · Back post | 2 | 29 in (737 mm) | 2×4 (1½ × 3½ in / 38 × 89 mm) | Pressure-treated or cedar. Both ends cut level at 15° from square, parallel; length is the long edge |
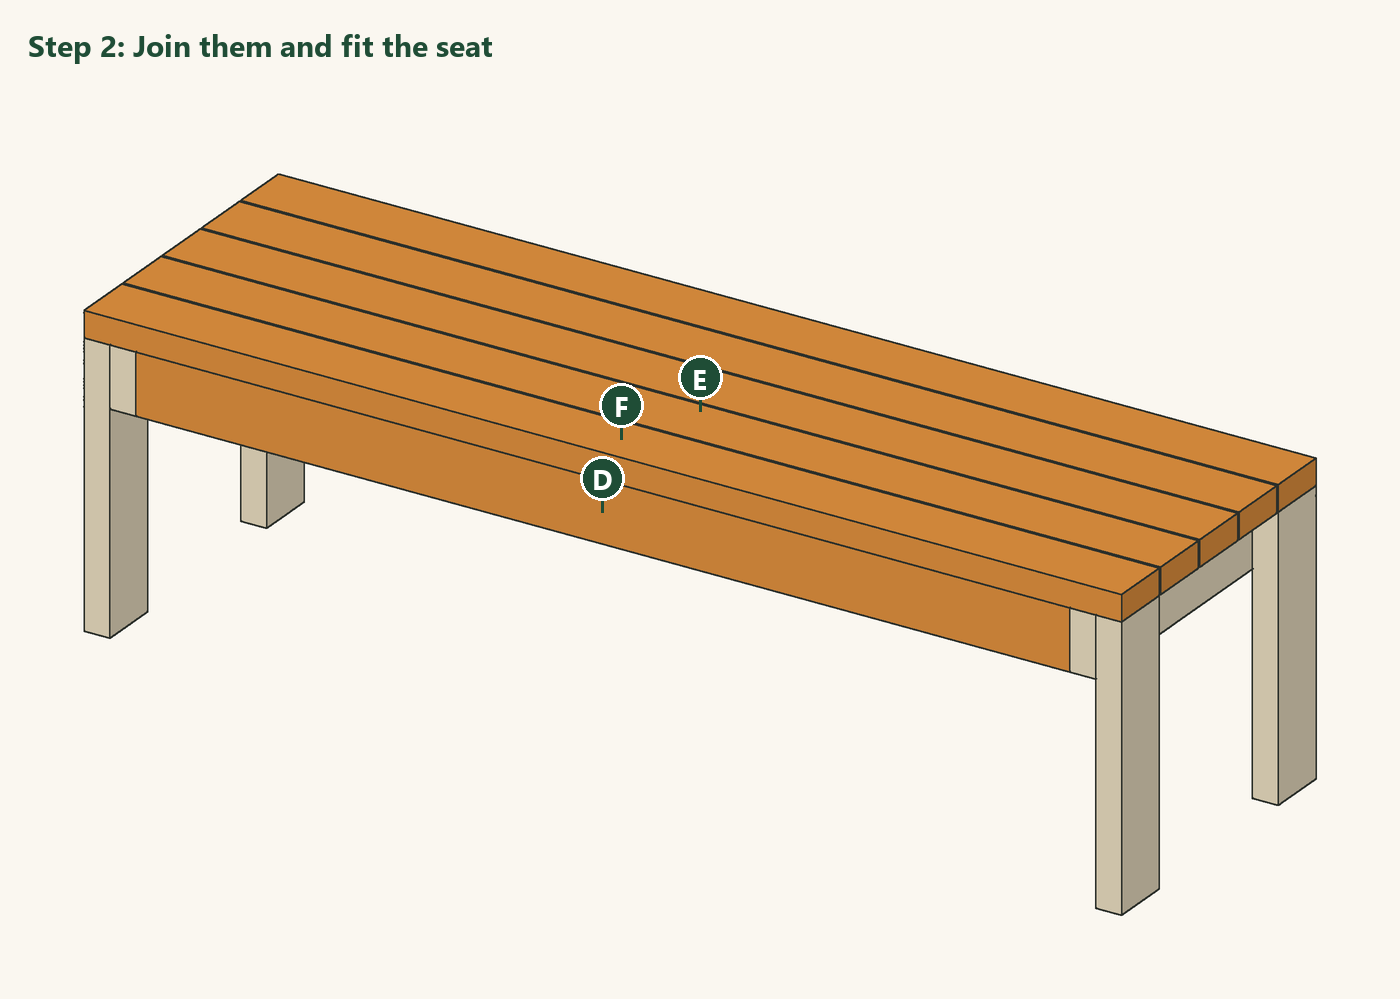
| D · Apron | 2 | 54 in (1372 mm) | 2×4 (1½ × 3½ in / 38 × 89 mm) | Pressure-treated or cedar |
| E · Centre support | 1 | 15 in (381 mm) | 2×4 (1½ × 3½ in / 38 × 89 mm) | Pressure-treated or cedar |
| F · Seat slat | 5 | 60 in (1524 mm) | 2×4 (1½ × 3½ in / 38 × 89 mm) | Pressure-treated or cedar |
| G · Back slat | 3 | 63 in (1600 mm) | 2×4 (1½ × 3½ in / 38 × 89 mm) | Pressure-treated or cedar. Square; lies on the back posts at 15° |
The cut list comes straight from the 3D model, which is checked so that no two boards overlap, every board is joined to another and every board is exactly the length listed. Measure the real gaps before cutting the parts that fit between others.
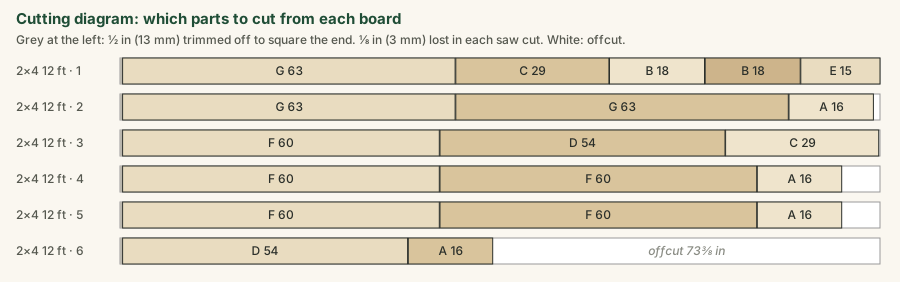
Cut the square parts from the cutting diagram: four 16 in legs (A), two 18 in side rails (B), two 54 in aprons (D), one 15 in centre support (E), five 60 in seat slats (F) and three 63 in back slats (G). Then set the saw to 15° and cut the two back posts (C) with both ends parallel, 29 in (737 mm) along the long edge. Mark each part with its letter.
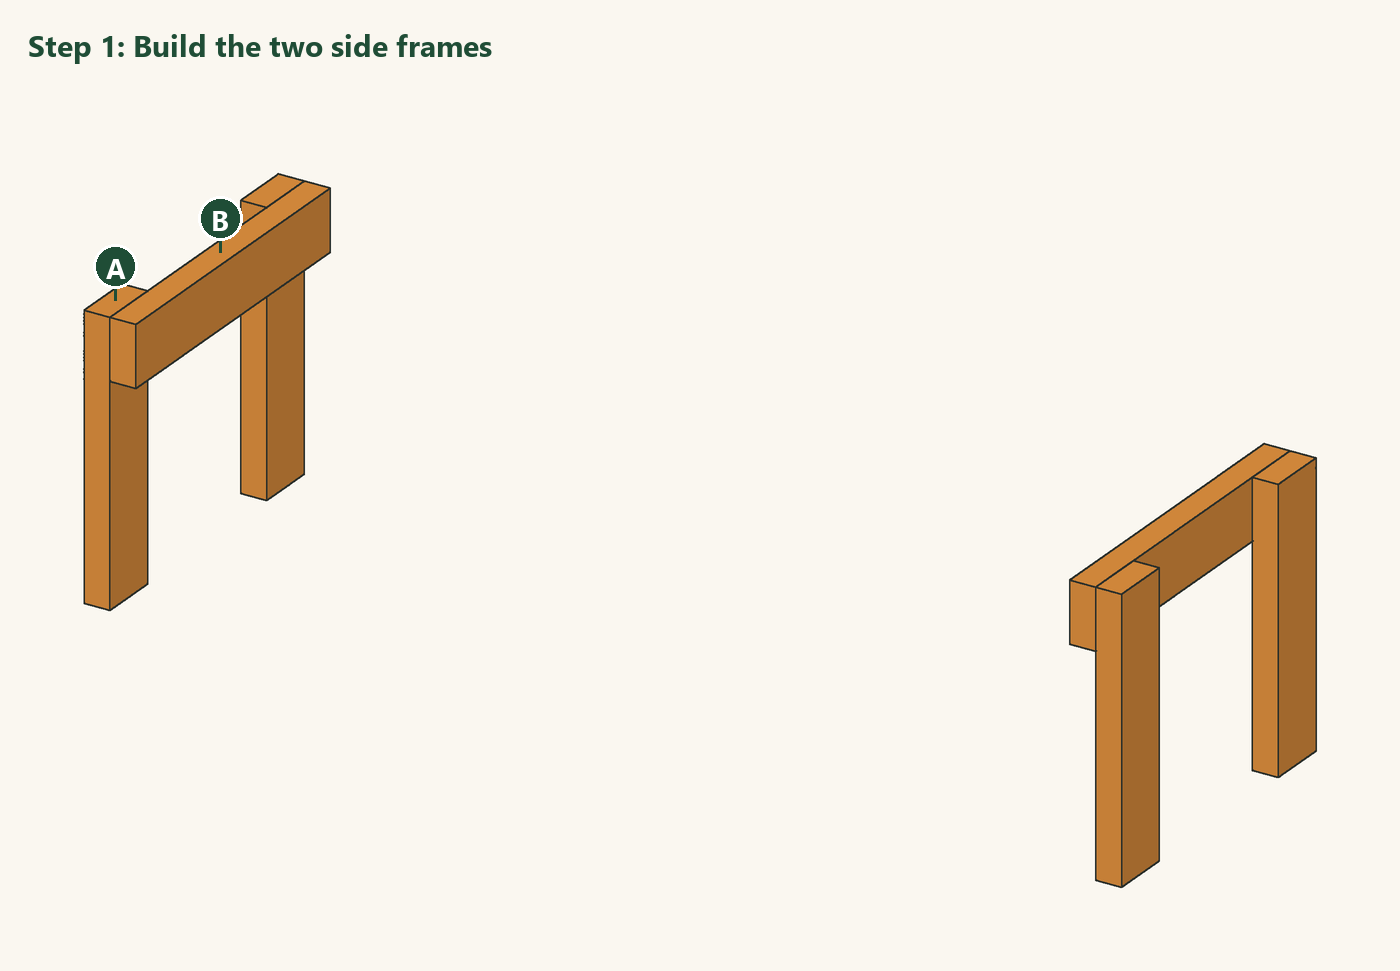
Screw a side rail (B) on edge across the inside of a front leg and a rear leg (A), with its top flush with the tops of the legs and its ends flush with the outer edges of the legs. Check that the legs are square to the rail. Build the second side frame as a mirror image.
Stand the side frames up and screw the front and back aprons (D) between the side rails, flush with the front and back edges and the tops. Fit the centre support (E) between the aprons in the middle. Lay the five seat slats (F) across the frame, flush with the outside faces of the legs at both ends, the outer slats flush with the front and back, and screw each slat to both side rails and the centre support.
Hold a back post (C) against the outside of a rear leg with its front edge 6 in (15 cm) above the ground, level with the front face of the leg, and leaning back 15° so its cut ends sit level. Clamp it, sit on the bench to check the angle, then drill two ⅜ in holes through post and leg and fit the carriage bolts. Do the same on the other side.
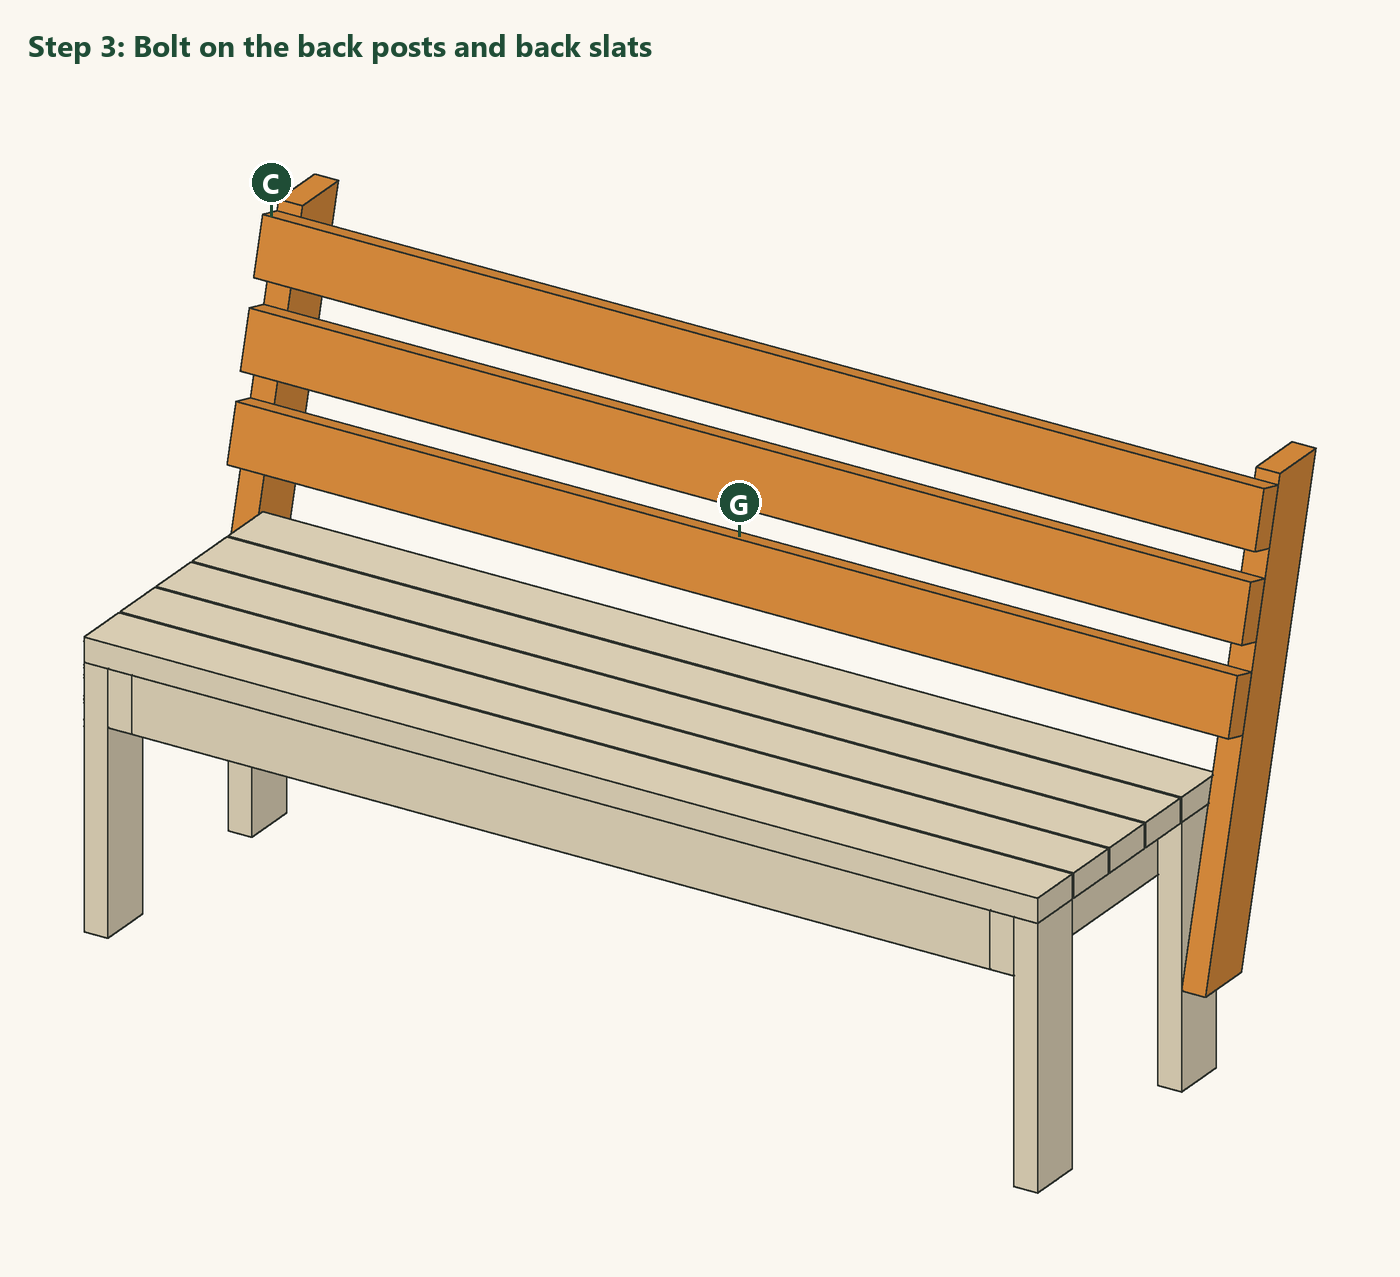
Screw the three back slats (G) across the front faces of the back posts, the lowest about 2½ in (6 cm) above the seat and the others with gaps of about 1⅝ in (42 mm), ends flush with the outer faces of the posts. Use two screws at each post.
Sand the seat and back, round over every edge, and oil or stain the bench on a dry day. Re-tighten the carriage bolts once the wood has dried for a few weeks.
The 3D model and drawings of this design, free to download for your own build. Open STEP in Fusion 360, FreeCAD or most CAD programs; STL and OBJ in SketchUp (with an importer), Blender or a 3D viewer; DXF in any 2D CAD program. Units are inches.
About this design: designed and modelled by DIY Outdoor Builds; the text was drafted with AI assistance and checked against the model (see our editorial policy). Design, drawings and 3D files © DIY Outdoor Builds: free to download and build for your own use, please do not republish the files. We have not built this exact design yet.
Building work can be dangerous and may need a permit. Check local rules and use a qualified professional for electrical, gas and structural work.
Share your own version with your photos, measurements and what you changed.
Our designOutdoor Furniture
 Our design
Outdoor Furniture
 Our design
Outdoor Furniture
 Our design
Outdoor Furniture
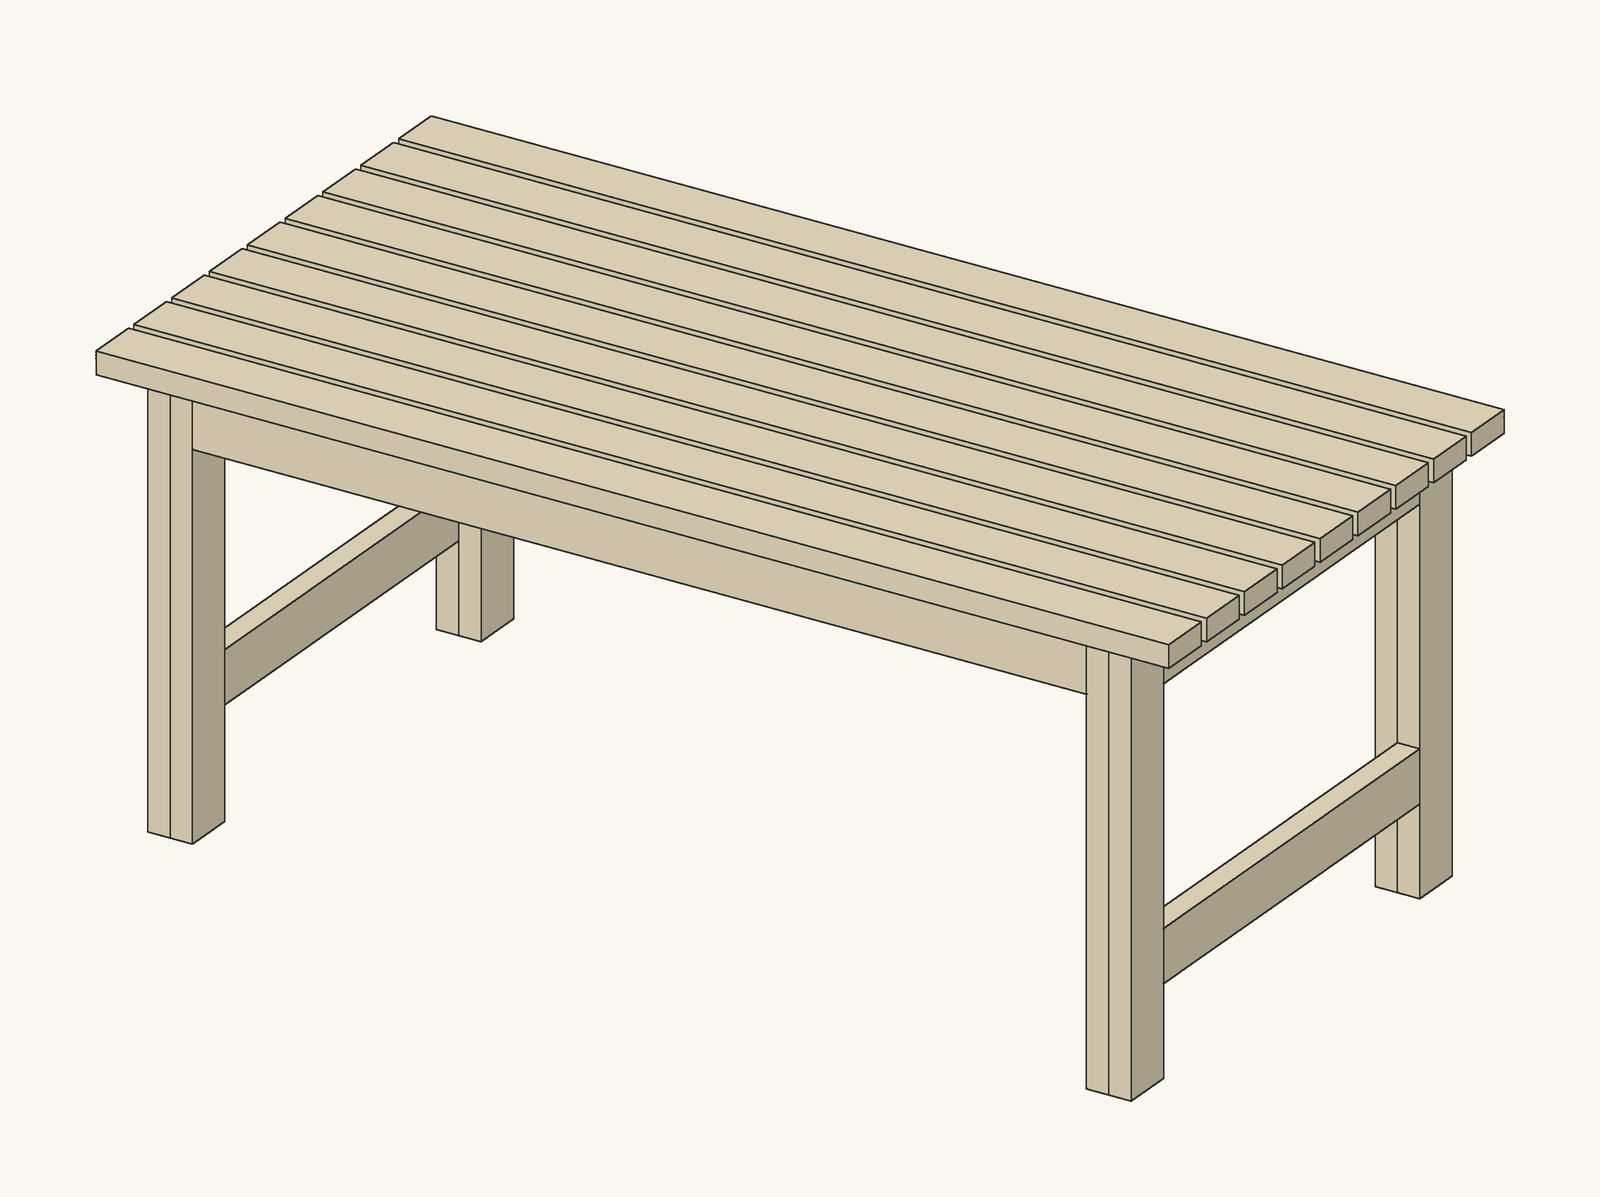
 2×4 Garden Bench Plans: a Simple Backless Bench with Cut ListOutdoor Furniture · Beginner · A few hours
 Build an Entryway Shoe Storage BenchIndoor Furniture · Intermediate · About a day
 How to Hang Sturdy Wooden Wall Shelves on BracketsIndoor Furniture · Beginner · A few hours
 Potting Bench Plans: Build a Potting Bench with a Lower ShelfOutdoor Furniture · Intermediate · About a day
From diyoutdoorbuilds.com/builds/garden-bench-with-back-2x4 · DIY Outdoor Builds