 Our design
Outdoor Furniture
Our designDesigned by DIY Outdoor Builds and checked board by board in a 3D model built from real lumber sizes. We have not built this one yet, so measure as you go.
A 6 ft patio dining table, 30 in high, with room for two people on each side and one at each end. It uses the same simple frame as our coffee table, scaled up, and comes from nine 12 ft 2×4s.
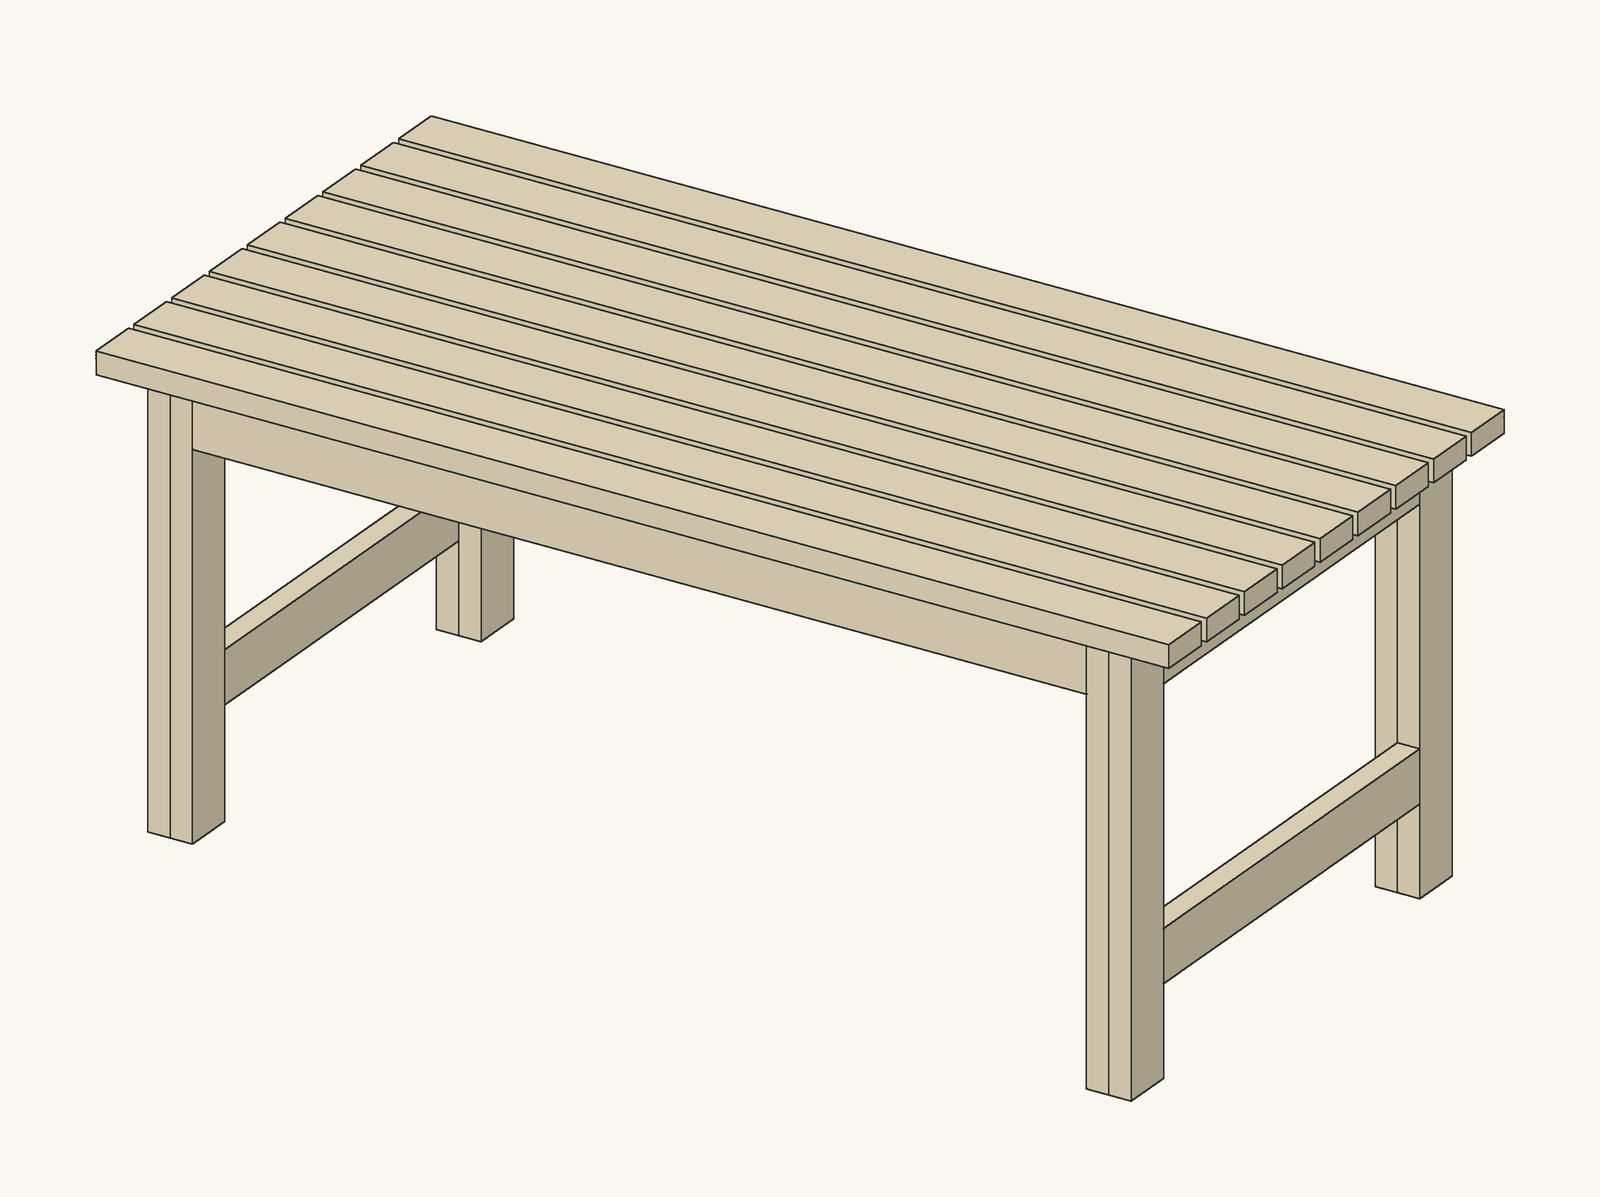
A table for eating outdoors needs to be the same height as an indoor dining table, 30 in (76 cm), and deep enough for plates on both sides with a dish in the middle: 36 in (91 cm) does that. At 72 in (1.83 m) long, it seats six: two on each long side and one at each end, where the top overhangs the legs by 3 in (76 mm).
The legs are two 2×4s screwed face to face. Aprons on edge join them under the top, flush with their outside faces, and two cross supports split the long top into three short spans so nothing sags under a heavy dish. At 6 in (15 cm) above the ground, a stretcher between the legs at each end stops the table racking sideways; the long sides stay open for legs and chairs.
The top boards are 72 in long, which is why the table is cut from 12 ft boards: two top boards cannot come out of one 12 ft board once you allow for the saw cut and squaring the ends, so each 12 ft board gives one top board plus legs or aprons. We modelled the table board by board in 3D and checked it for overlaps, loose boards and sizes; we have not built this exact table yet, so measure as you go.
| Item | Qty | Notes |
|---|---|---|
| 2×4 boards, 12 ft (3.6 m), pressure-treated or cedar | 9 | Each gives one top board plus legs or frame parts; see the cutting diagram |
| Exterior screws 3 in (76 mm) | About 130 | Coated or stainless |
| Exterior oil or stain | About 1 quart (1 L) | Optional; oil the top on all sides |
| Part | Qty | Length | Section | Notes |
|---|---|---|---|---|
| A · Leg board | 8 | 28½ in (724 mm) | 2×4 (1½ × 3½ in / 38 × 89 mm) | Pressure-treated or cedar |
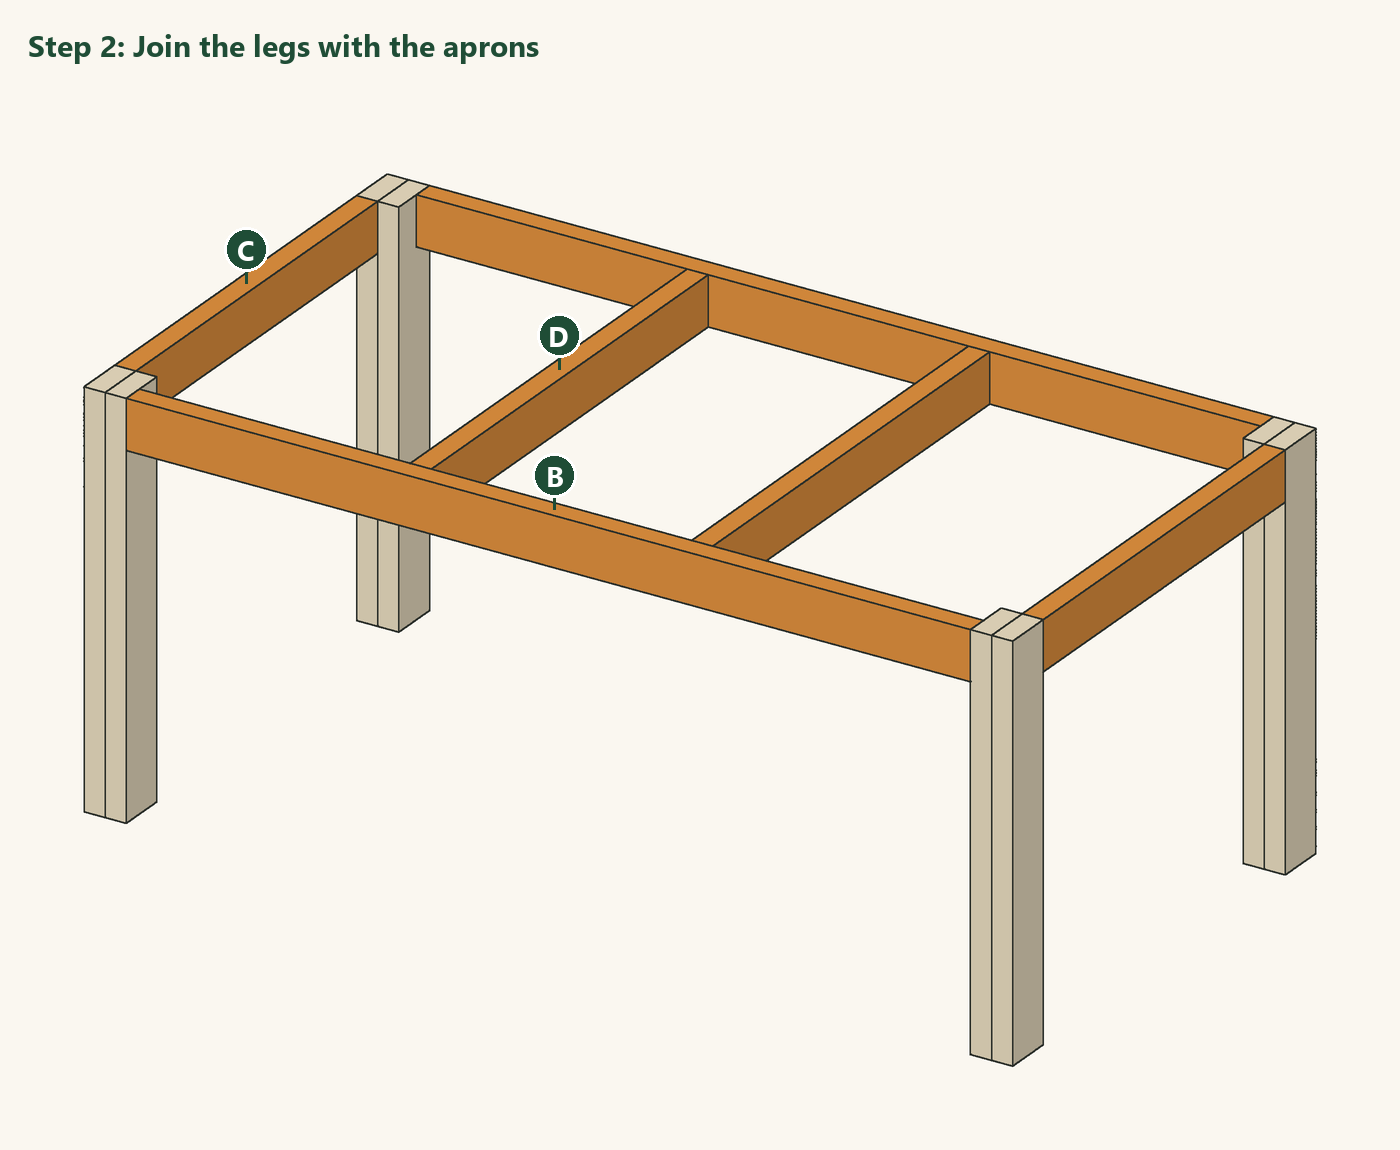
| B · Long apron | 2 | 60 in (1524 mm) | 2×4 (1½ × 3½ in / 38 × 89 mm) | Pressure-treated or cedar |
| C · Short apron | 2 | 27½ in (698 mm) | 2×4 (1½ × 3½ in / 38 × 89 mm) | Pressure-treated or cedar |
| D · Cross support | 2 | 31½ in (800 mm) | 2×4 (1½ × 3½ in / 38 × 89 mm) | Pressure-treated or cedar |
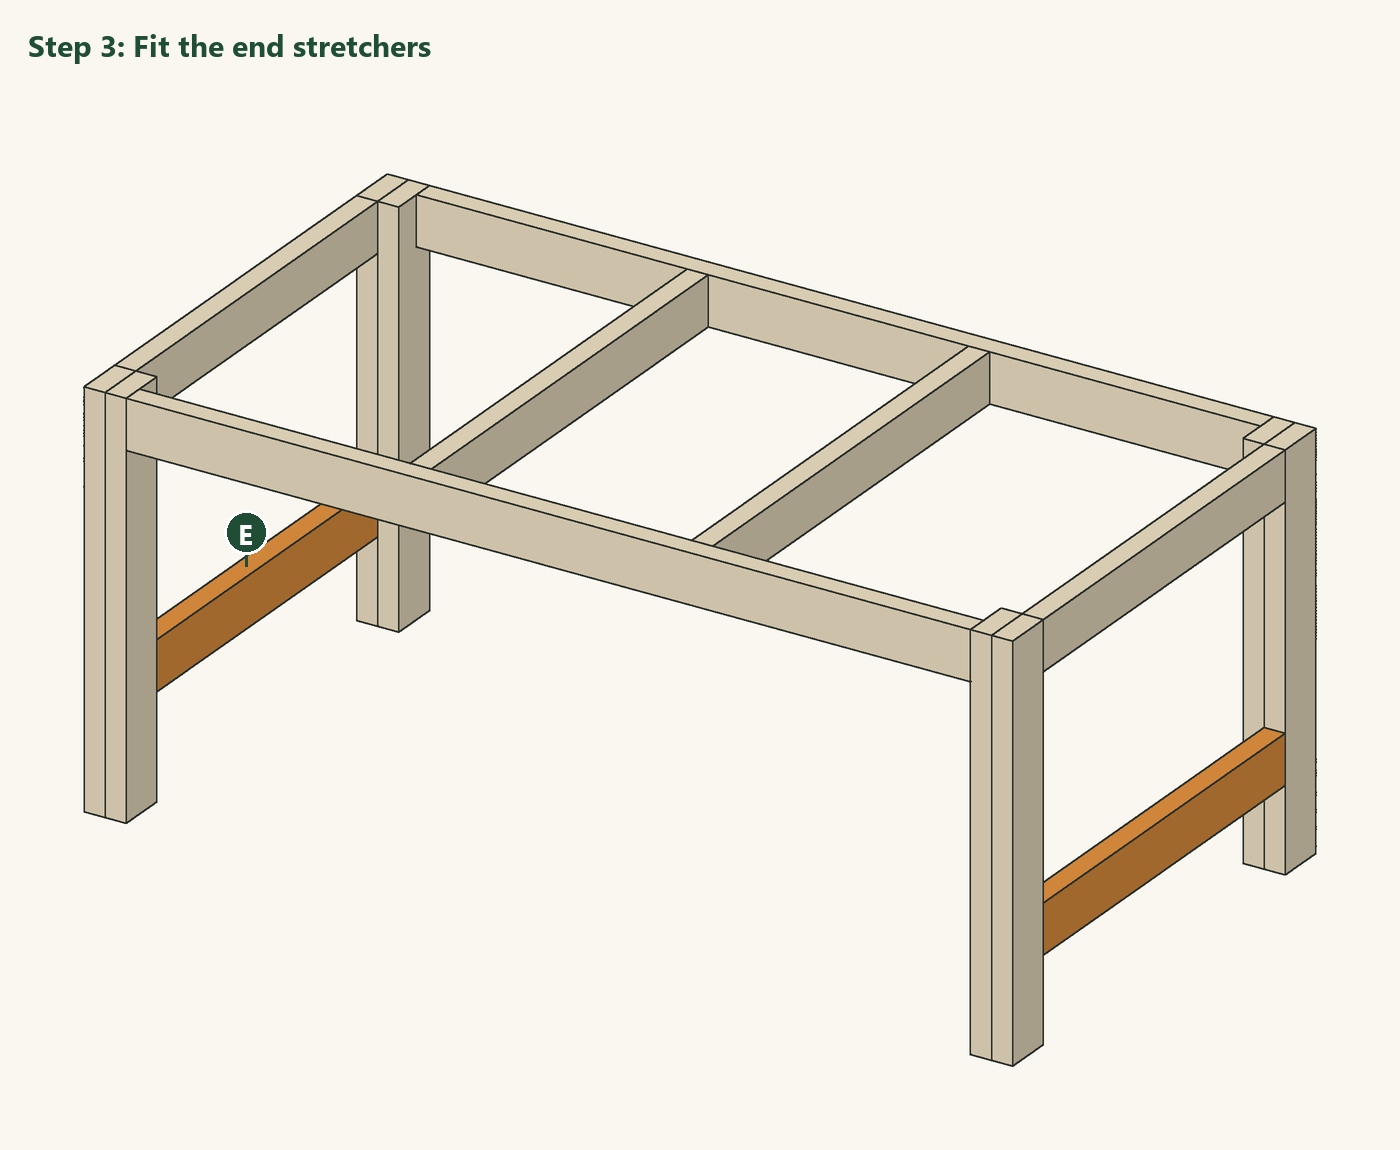
| E · End stretcher | 2 | 27½ in (698 mm) | 2×4 (1½ × 3½ in / 38 × 89 mm) | Pressure-treated or cedar |
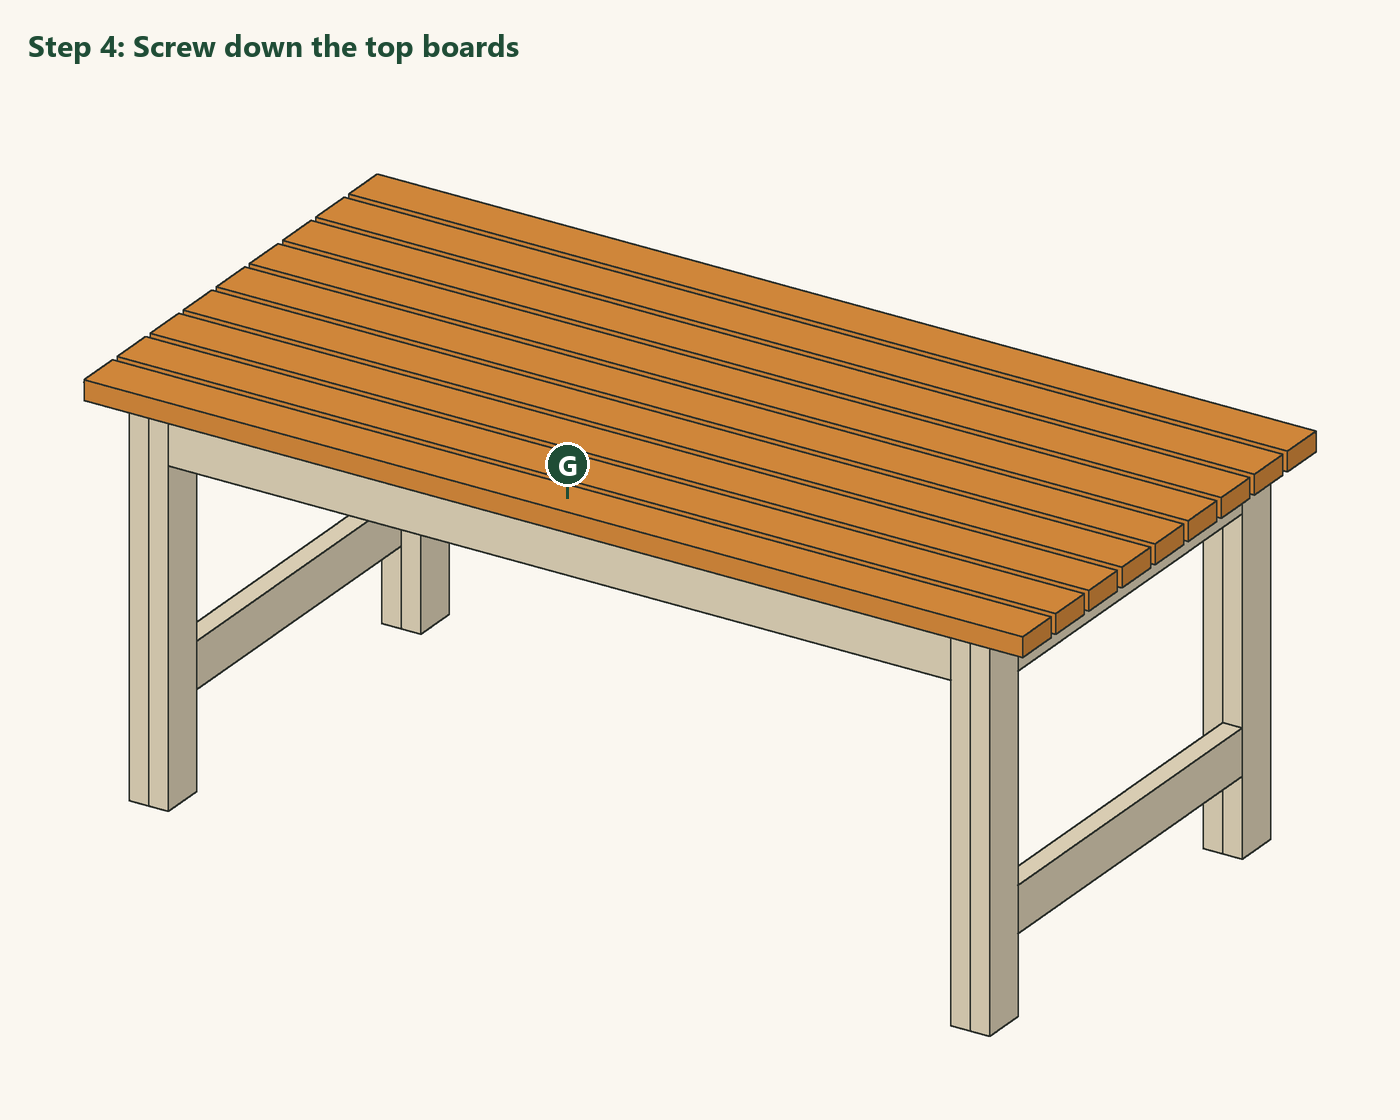
| G · Top board | 9 | 72 in (1829 mm) | 2×4 (1½ × 3½ in / 38 × 89 mm) | Pressure-treated or cedar |
The cut list comes straight from the 3D model, which is checked so that no two boards overlap, every board is joined to another and every board is exactly the length listed. Measure the real gaps before cutting the parts that fit between others.
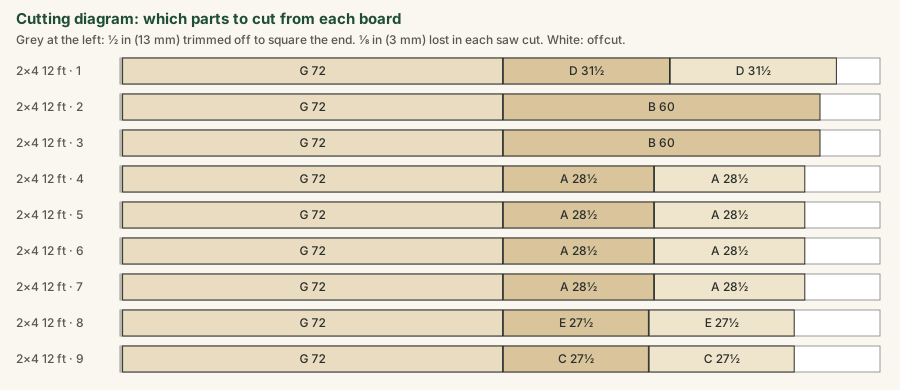
Cut the 25 parts from the nine boards following the cutting diagram: one 72 in top board (G) from each 12 ft board, then the legs, aprons and supports from what is left. Square one end of every board first, use a stop block for parts that repeat, and write the part letter on each piece.
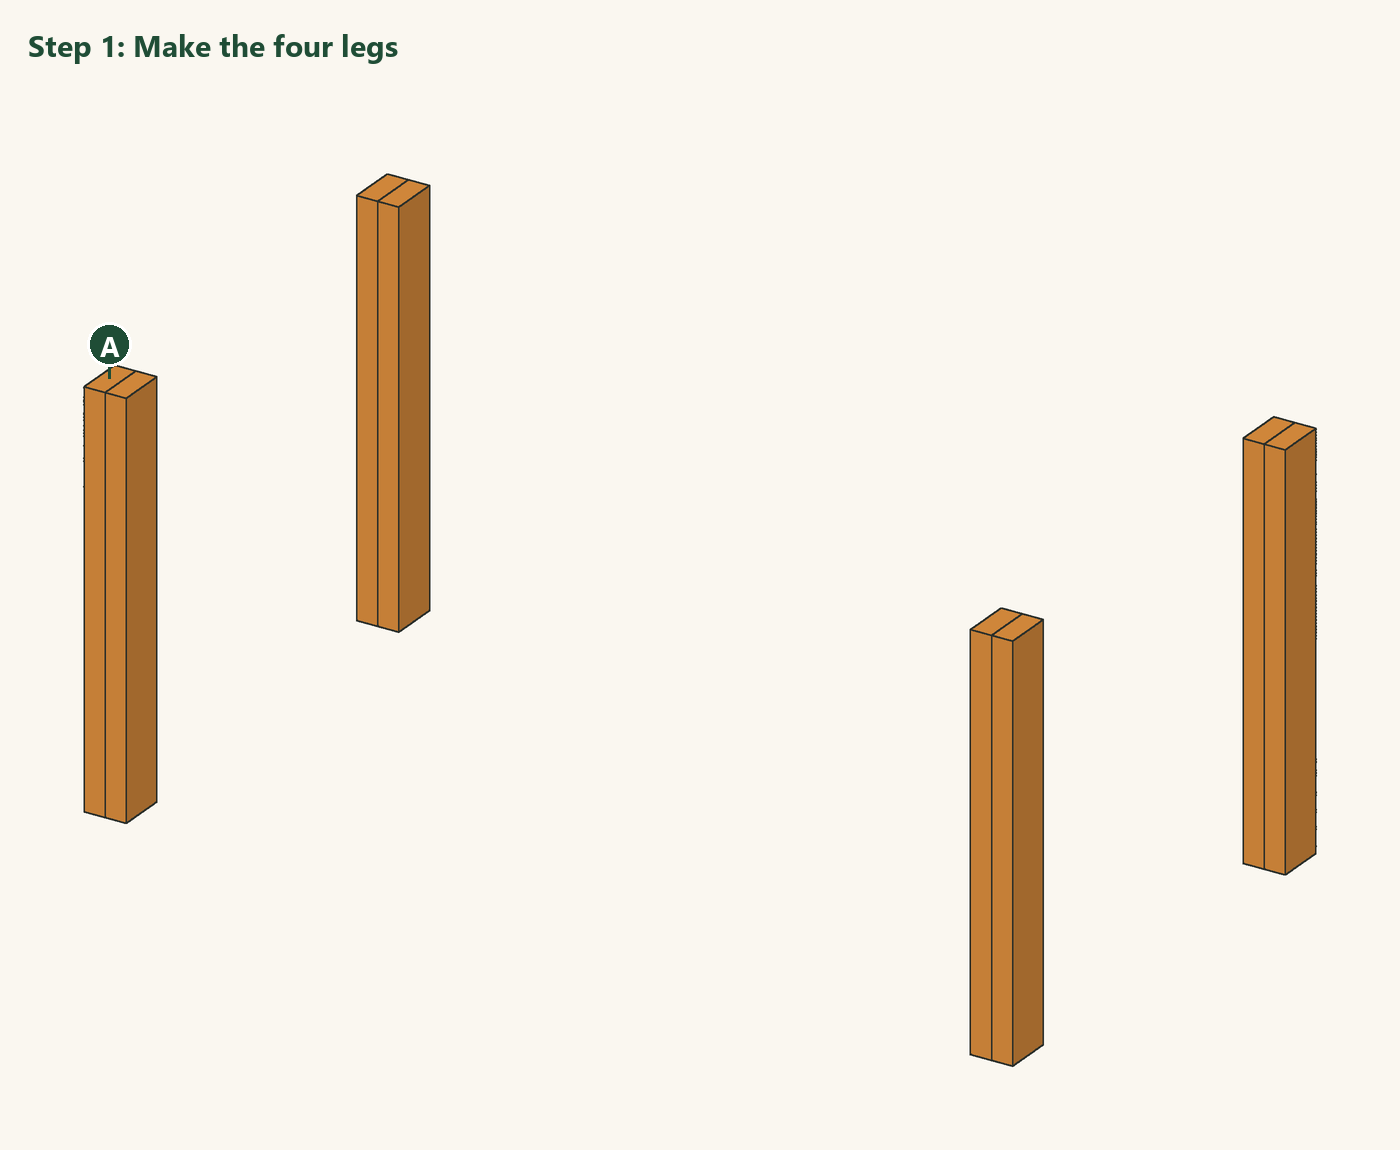
Screw two leg boards (A) face to face with their ends flush, using five 3 in (76 mm) screws staggered along the length. Make four legs. Put the hollow sides of any bowed boards together so the legs come out straight.
Build the two end frames first: a short apron (C) between two legs, on edge, flush with the outer faces and tops. Join the end frames with the two long aprons (B), then fit the two cross supports (D) between the long aprons, a third of the way in from each end. Check that the diagonals are equal before you drive the last screws.
Screw an end stretcher (E) between the legs at each end, 6 in (15 cm) above the ground, flush with the outer faces of the legs. These stop the table racking sideways when someone leans on it; check that the table stands without rocking before you fix them.
Lay the nine top boards (G) across the frame with 3 in (76 mm) overhang at each end, the outer boards ¾ in (19 mm) past the frame at each side and the rest spread evenly. Pre-drill and screw each board to both short aprons and both cross supports, two screws at each crossing.
Sand the top smooth, round over all edges and corners, and oil or stain the table on a dry day. Treat the underside and the leg bottoms too: they soak up water from wet ground and damp patio slabs.
The 3D model and drawings of this design, free to download for your own build. Open STEP in Fusion 360, FreeCAD or most CAD programs; STL and OBJ in SketchUp (with an importer), Blender or a 3D viewer; DXF in any 2D CAD program. Units are inches.
About this design: designed and modelled by DIY Outdoor Builds; the text was drafted with AI assistance and checked against the model (see our editorial policy). Design, drawings and 3D files © DIY Outdoor Builds: free to download and build for your own use, please do not republish the files. We have not built this exact design yet.
Building work can be dangerous and may need a permit. Check local rules and use a qualified professional for electrical, gas and structural work.
Share your own version with your photos, measurements and what you changed.
Our designOutdoor Furniture
 Our design
Outdoor Furniture
 Our design
Outdoor Furniture
 Our design
Outdoor Furniture
 2×4 Garden Bench Plans: a Simple Backless Bench with Cut ListOutdoor Furniture · Beginner · A few hours
 Build an Entryway Shoe Storage BenchIndoor Furniture · Intermediate · About a day
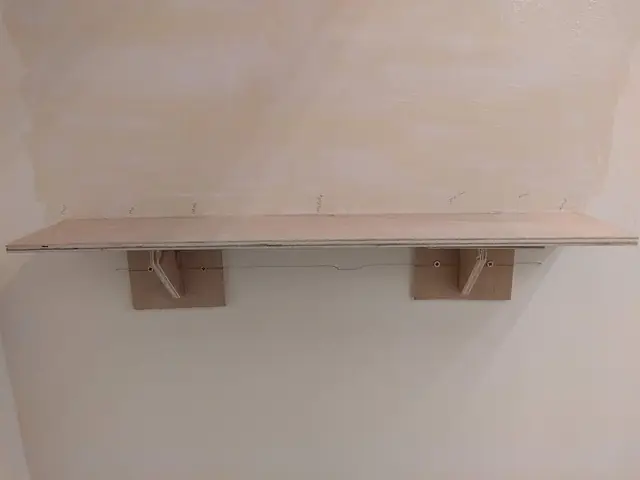 How to Hang Sturdy Wooden Wall Shelves on BracketsIndoor Furniture · Beginner · A few hours
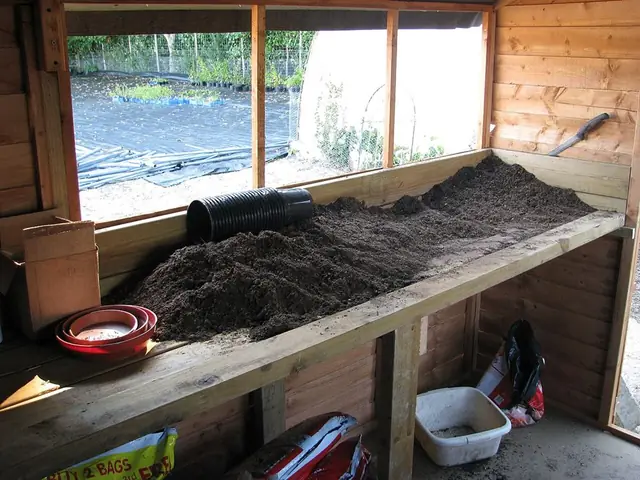 Potting Bench Plans: Build a Potting Bench with a Lower ShelfOutdoor Furniture · Intermediate · About a day
From diyoutdoorbuilds.com/builds/modern-2x4-outdoor-dining-table · DIY Outdoor Builds