 Our design
Raised Garden Beds
Our designDesigned by DIY Outdoor Builds and checked board by board in a 3D model built from real lumber sizes. We have not built this one yet, so measure as you go.
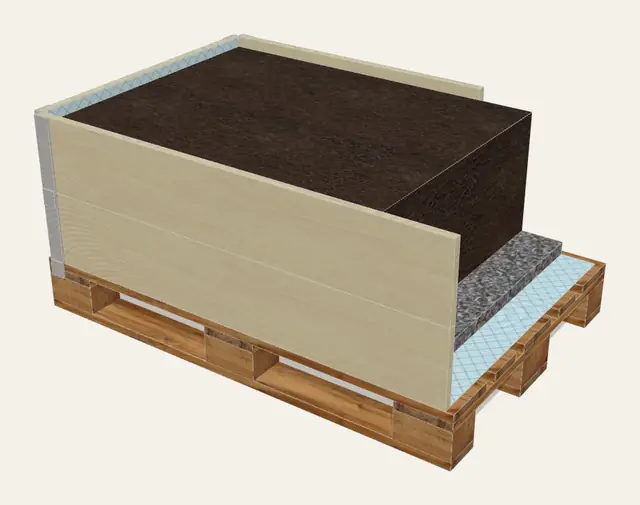
A wooden compost bin about 3 ft (91 cm) each way, with slatted sides for air and a front of loose boards that slide down in slots. Lift the boards out one by one to turn the heap or dig out finished compost from the bottom.
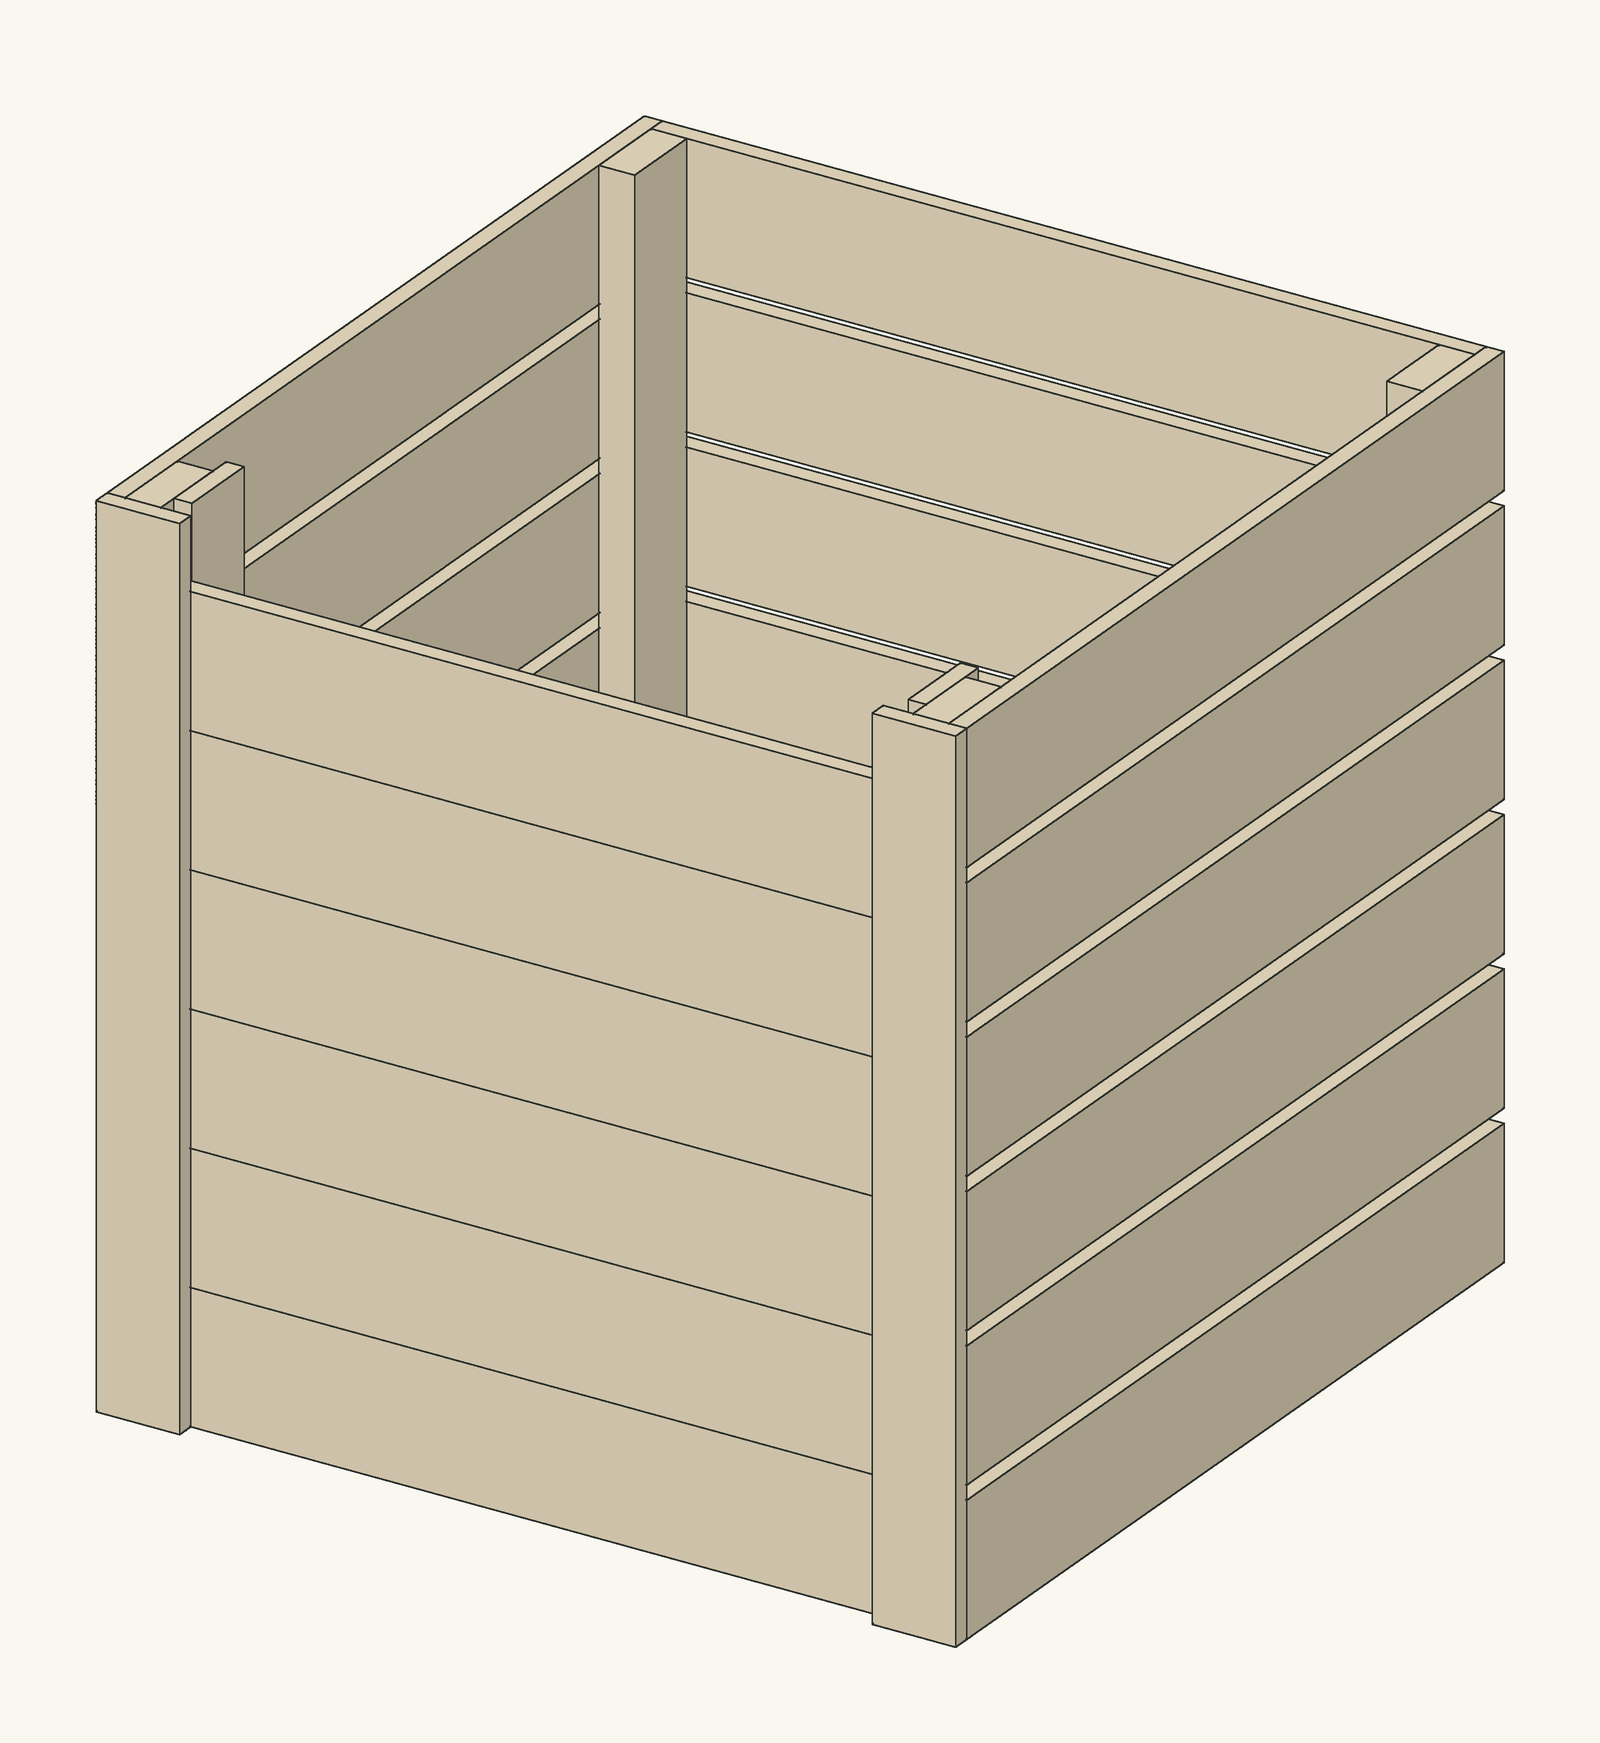
A compost heap needs air, moisture and to be turned now and then. Closed plastic bins make the last part hard, and open heaps look untidy. This bin is a simple wooden box: the sides and back are 1×6 boards with gaps of about ⅝ in (15 mm) between them for air, and the front is made of six loose boards that drop into a slot at each side. With the front boards out, you can reach in with a fork or a spade at ground level; with them in, the heap is held neatly on all four sides.
A bin of about one cubic yard (here 0.64 m³ inside) is the smallest size that heats up well, which makes the compost break down faster and kills many weed seeds. The bin stands directly on the soil, so worms can move in from below. If you want two or three bins side by side, build one and then use its side as the side of the next, so each extra bin needs only a back, one side and a front.
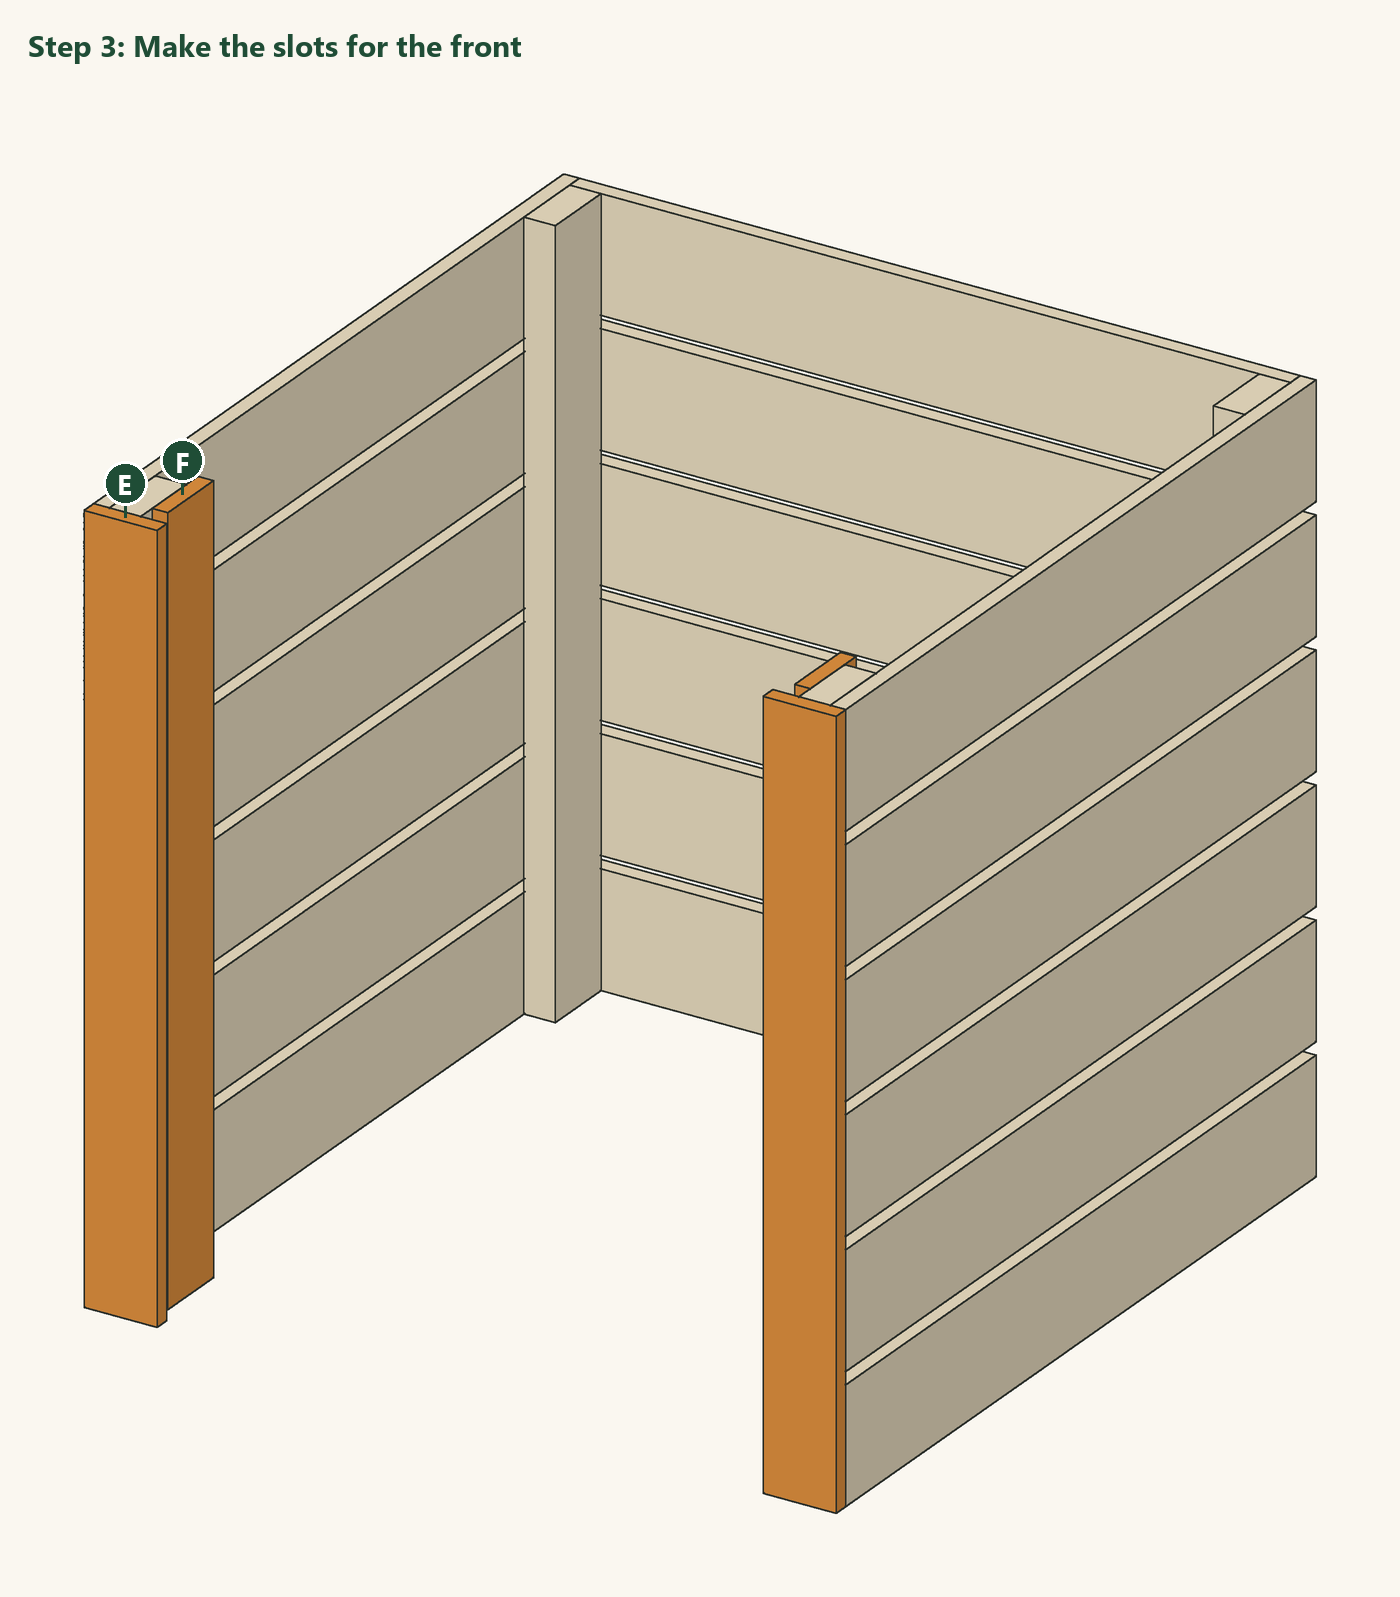
The slot for the front boards is made from two 1×4 strips at each front post: one on the front face, which overlaps the opening by about 1¼ in (32 mm), and one inside, which leaves a slot ⅞ in (22 mm) wide for the ¾ in boards. The front boards are cut ¼ in shorter than the gap between the posts so they slide freely even when the wood swells.
We designed it as a 3D model using real lumber sizes and a script checked that no two boards overlap, that every board touches and can be screwed to another, and that each board in the model is exactly the size in the cut list. The cut list, the cutting diagram and the step drawings on this page all come from that same model, so they cannot disagree. We have not built this exact design ourselves yet, so measure your real boards as you go: lumber varies slightly in width and is rarely perfectly straight.
| Item | Qty | Notes |
|---|---|---|
| 1×6 boards, 12 ft (3.6 m) | 6 | Sides, back and the loose front boards; see the cutting diagram |
| 2×4 boards, 8 ft (2.4 m), pressure-treated | 2 | Four corner posts of 36 in |
| 1×4 boards, 8 ft (2.4 m) | 2 | Two front strips and two slot stops of 36 in |
| Exterior screws 1⅝ in (41 mm) | About 100 | Two at each end of every side and back board, plus the strips |
| Part | Qty | Length | Section | Notes |
|---|---|---|---|---|
| A · Front post | 2 | 36 in (914 mm) | 2×4 (1½ × 3½ in / 38 × 89 mm) | Pressure-treated or cedar |
| B · Back post | 2 | 36 in (914 mm) | 2×4 (1½ × 3½ in / 38 × 89 mm) | Pressure-treated or cedar |
| C · Side board | 12 | 36 in (914 mm) | 1×6 (¾ × 5½ in / 19 × 140 mm) | Pressure-treated or cedar |
| D · Back board | 6 | 34½ in (876 mm) | 1×6 (¾ × 5½ in / 19 × 140 mm) | Pressure-treated or cedar |
| E · Front strip | 2 | 36 in (914 mm) | 1×4 (¾ × 3½ in / 19 × 89 mm) | Pressure-treated or cedar |
| F · Slot stop | 2 | 36 in (914 mm) | 1×4 (¾ × 3½ in / 19 × 89 mm) | Pressure-treated or cedar |
| G · Lift-out front board | 6 | 31¼ in (794 mm) | 1×6 (¾ × 5½ in / 19 × 140 mm) | Pressure-treated or cedar |
The cut list comes straight from the 3D model, which is checked so that no two boards overlap, every board is joined to another and every board is exactly the length listed. Measure the real gaps before cutting the parts that fit between others.
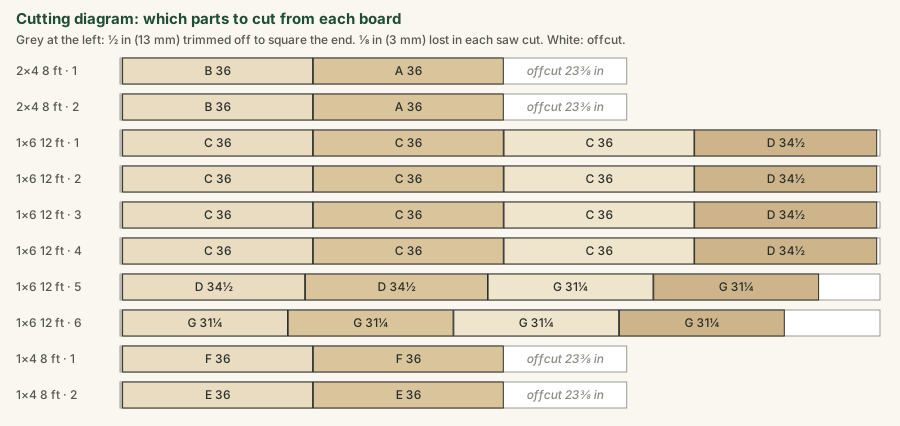
Cut the 32 parts following the cutting diagram: twelve side boards (C, 36 in), six back boards (D, 34½ in) and six front boards (G, 31¼ in) from the 1×6s; four posts (A and B, 36 in) from the 2×4s; and four strips (E and F, 36 in) from the 1×4s. Write the letter on each piece.
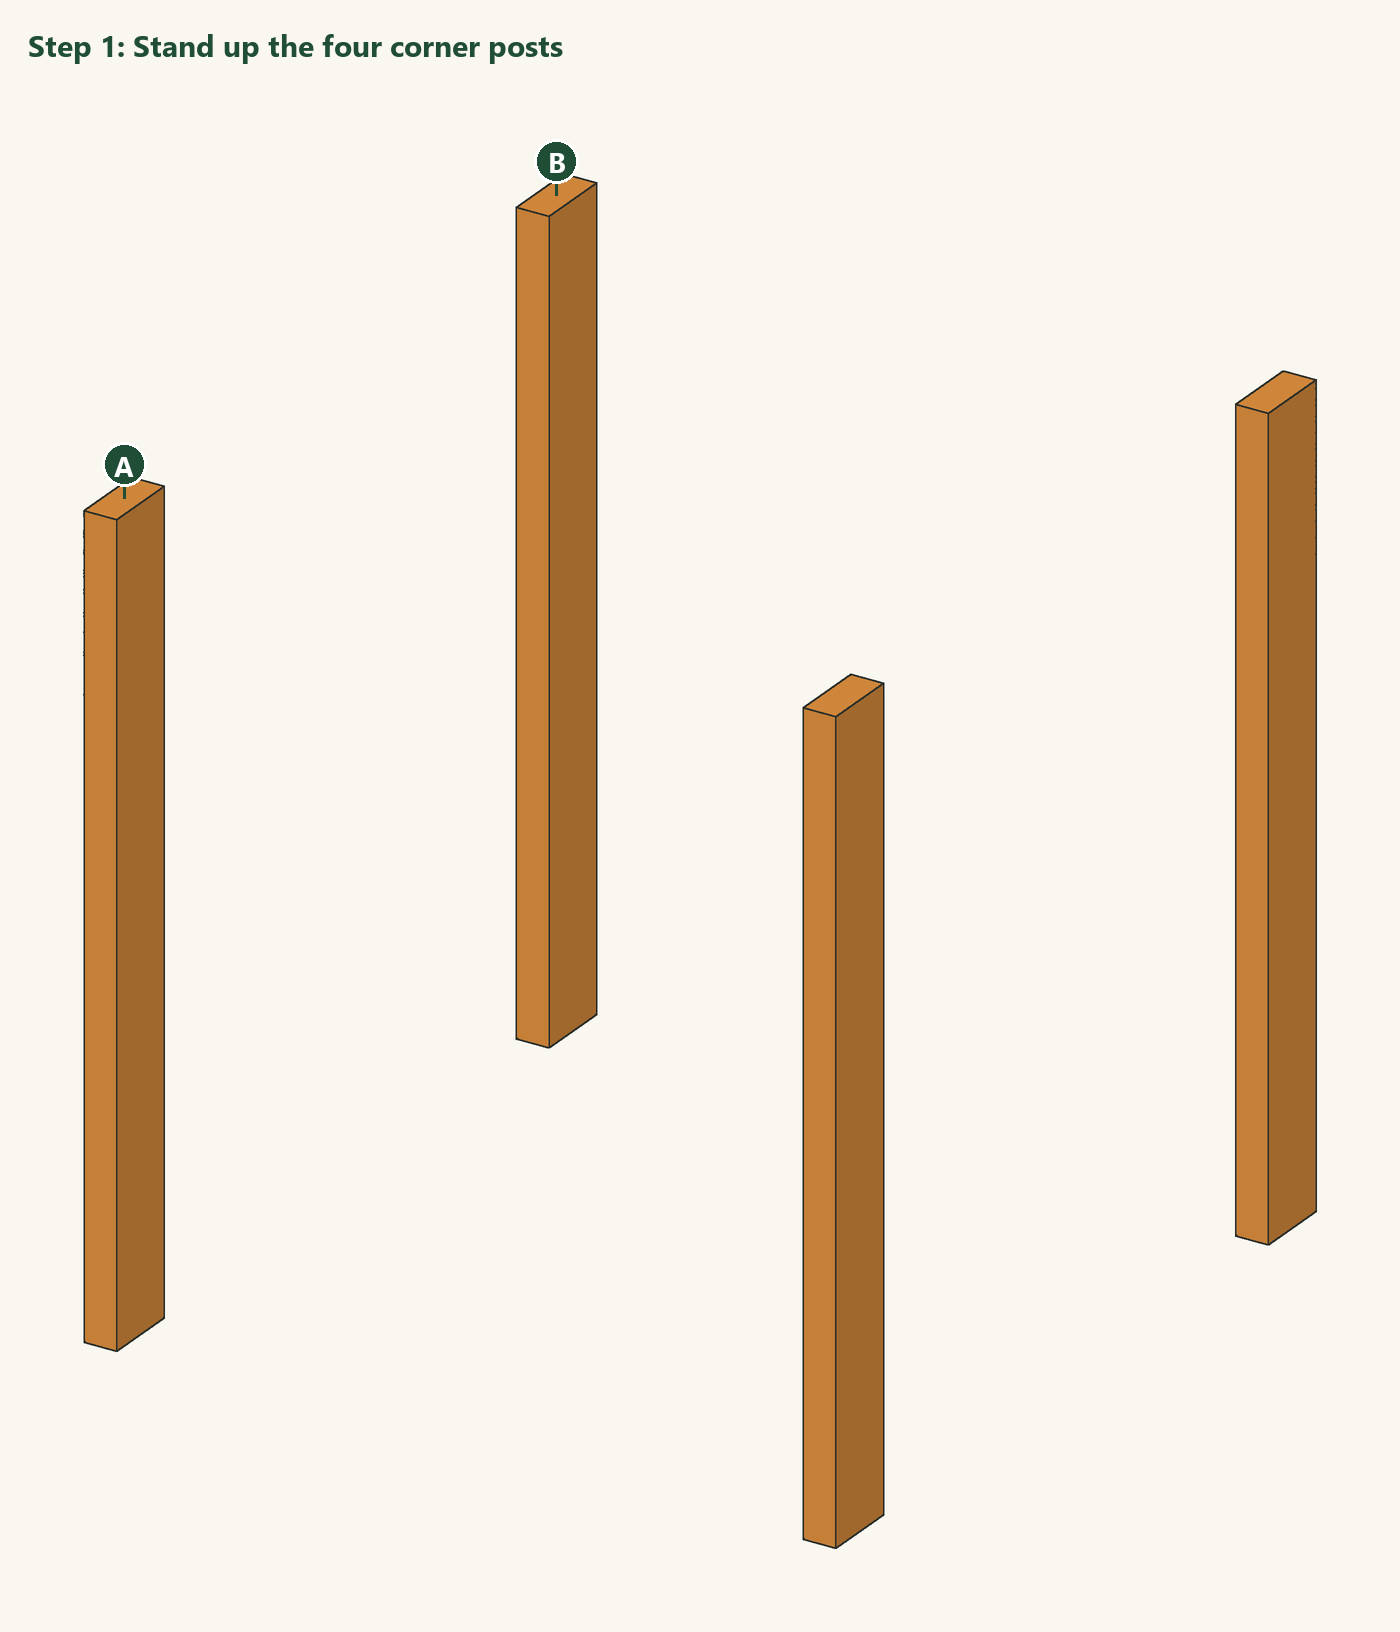
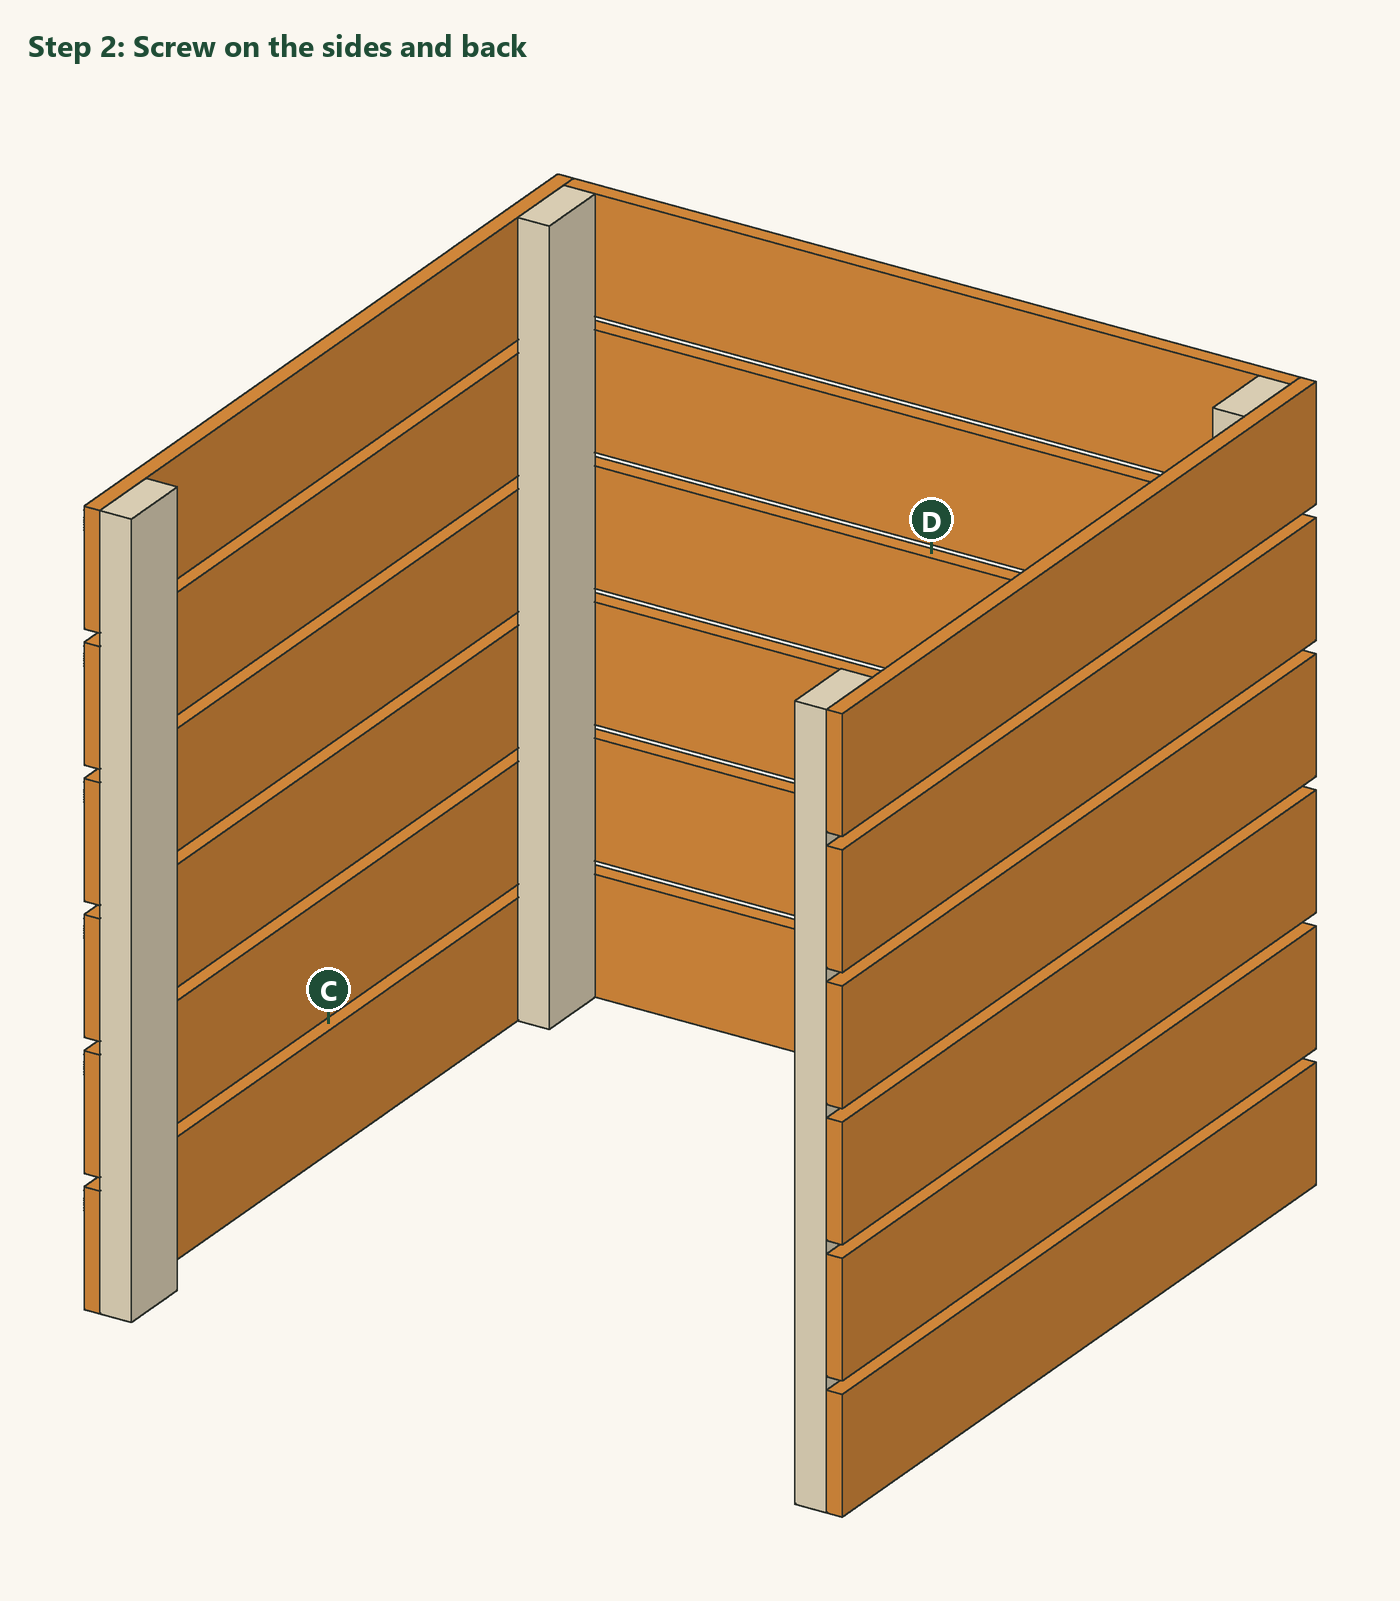
Lay a front post (A) and a back post (B) on the ground with their 3½ in faces up, about 34 in apart. Screw the six side boards (C) across them, starting with one flush with the bottom ends and using the spacer to keep a gap of about ⅝ in between boards. The side boards stick out ¾ in past the back post, where the back boards will fit, and run flush with the front of the front post. Build the second side as a mirror image.
Stand the two sides up 34½ in apart on level ground. Fit the back boards (D) between the side boards at the back, level with each row of side boards, and screw them to the back posts. Check that the bin is square by measuring the diagonals across the top.
Screw a front strip (E) to the front of each front post and the front edges of the side boards, flush with the outside, so that about 1¼ in of the strip overlaps the opening. Then screw a slot stop (F) flat against the inside face of each front post, leaving a gap of exactly ⅞ in (22 mm) behind the front strip; use two stacked scraps of ¾ in board plus a playing card as a spacer.
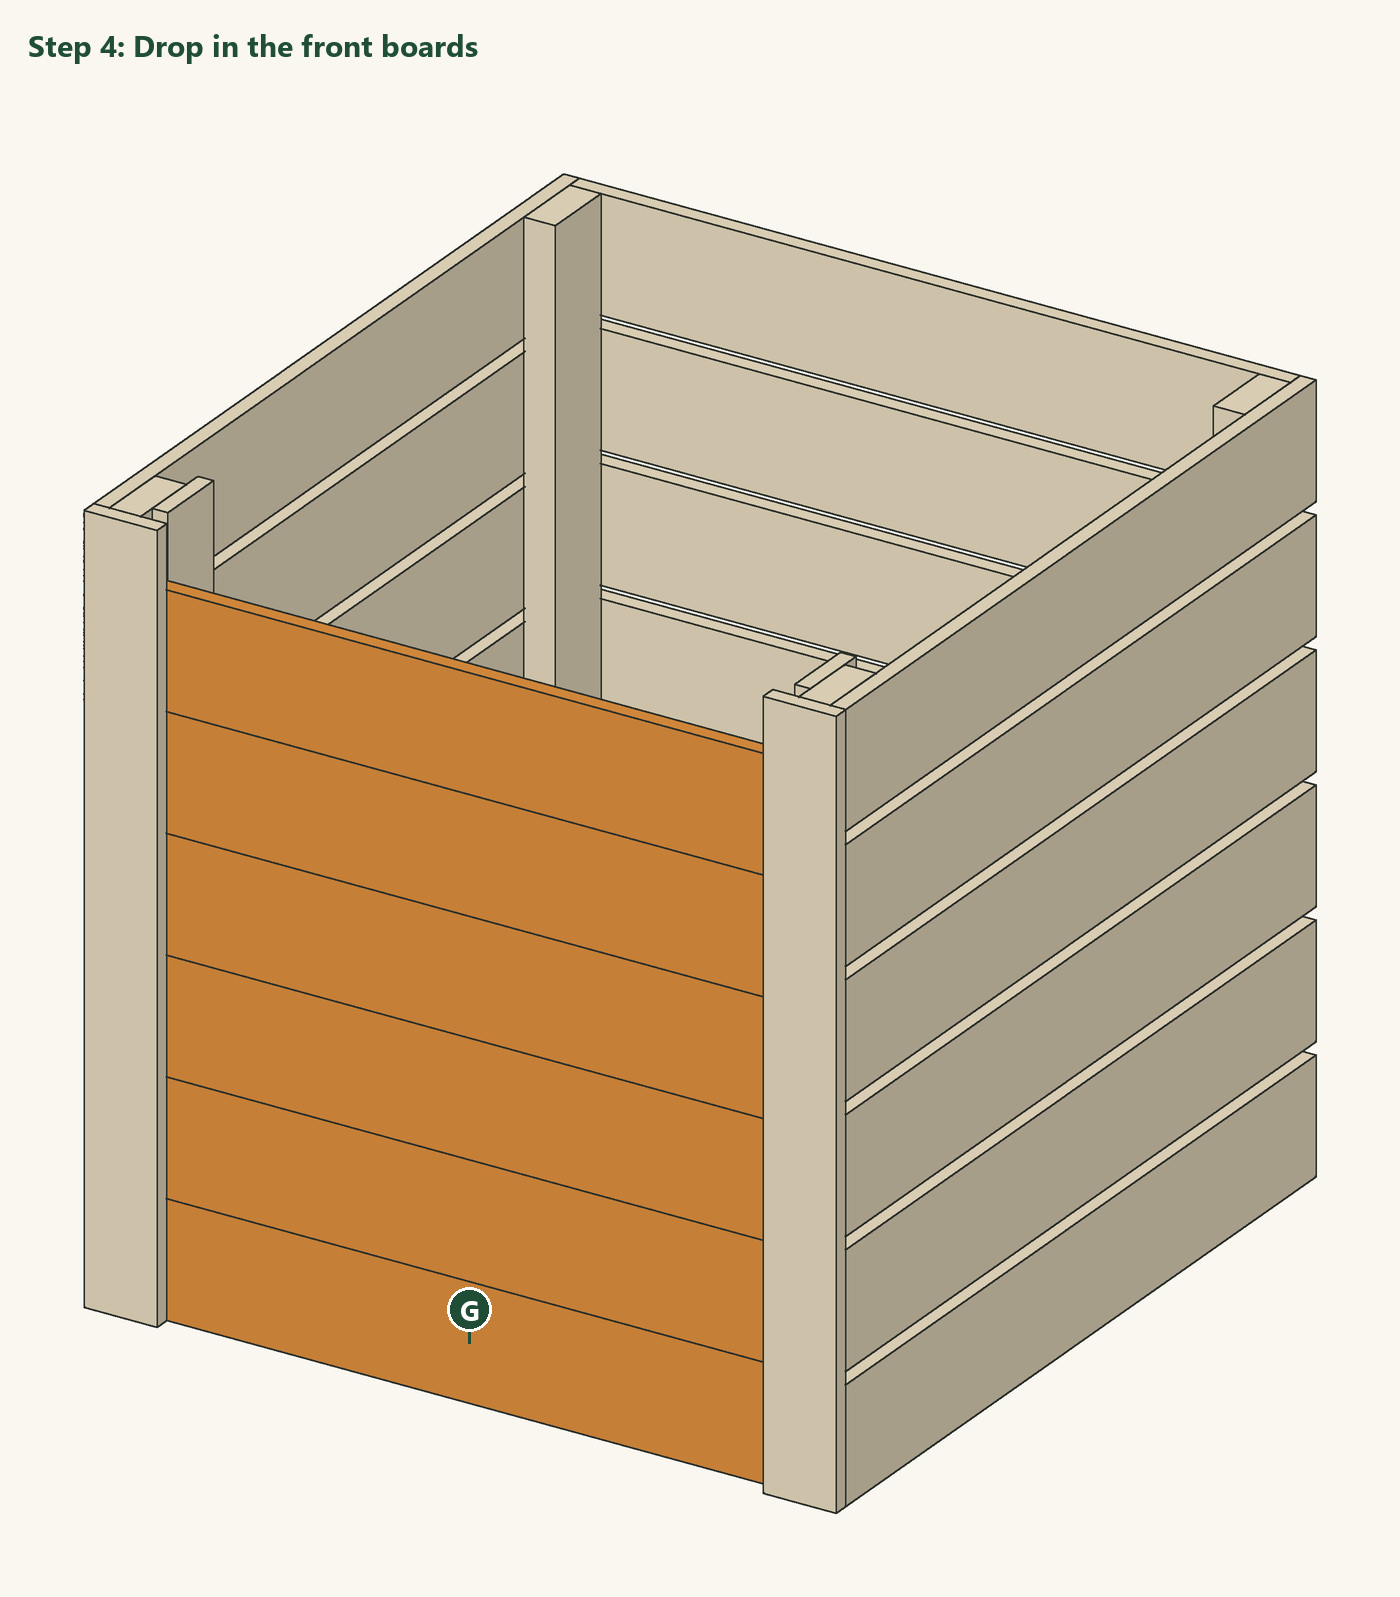
Slide the six front boards (G) down into the slots, one on top of the other. They should move freely; if one sticks, plane or sand its ends. Add boards as the heap grows and lift them out from the top to turn the compost or dig out the finished compost from the bottom.
Set the bin on bare soil in a spot with some shade, so the heap does not dry out. Start with a layer of coarse stems or twigs at the bottom for air, then add green material (grass clippings, vegetable scraps) and brown material (dry leaves, shredded cardboard) in roughly equal amounts. Keep it as moist as a wrung-out sponge and turn it every few weeks.
The 3D model and drawings of this design, free to download for your own build. Open STEP in Fusion 360, FreeCAD or most CAD programs; STL and OBJ in SketchUp (with an importer), Blender or a 3D viewer; DXF in any 2D CAD program. Units are inches.
About this design: designed and modelled by DIY Outdoor Builds; the text was drafted with AI assistance and checked against the model (see our editorial policy). Design, drawings and 3D files © DIY Outdoor Builds: free to download and build for your own use, please do not republish the files. We have not built this exact design yet.
Building work can be dangerous and may need a permit. Check local rules and use a qualified professional for electrical, gas and structural work.
Share your own version with your photos, measurements and what you changed.
Our designRaised Garden Beds
 Our design
Fences & Gates
 Open design
Raised Garden Beds
 Member project
Raised Garden Beds
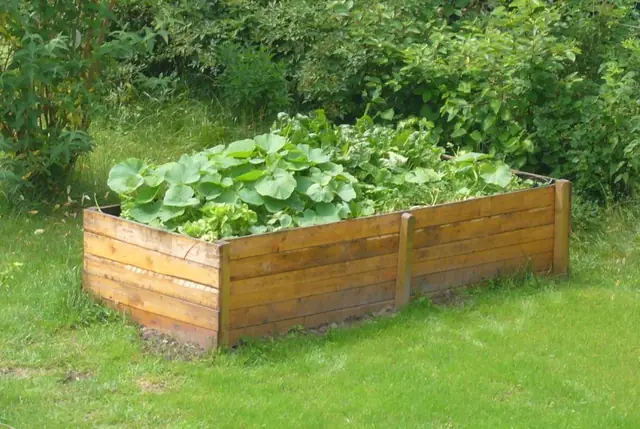 4×8 Raised Garden Bed: Cut List, Soil Needed and Build StepsRaised Garden Beds · Beginner · A few hours
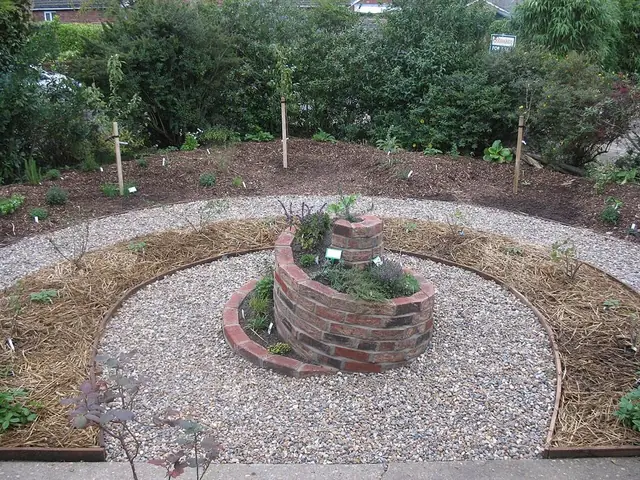 Build a Stone Herb Spiral for a Small GardenGarden Layouts · Intermediate · About a day
 Build a Wooden Z-Brace Garden GateFences & Gates · Beginner · About a day
 Build an Elevated Planter Box on Legs (Waist-High Garden)Raised Garden Beds · Intermediate · About a day
From diyoutdoorbuilds.com/builds/slatted-compost-bin-lift-out-front · DIY Outdoor Builds