 Guide
Storage Solutions
GuideStep-by-step plan written by our editors, with materials, tools and every step in order.
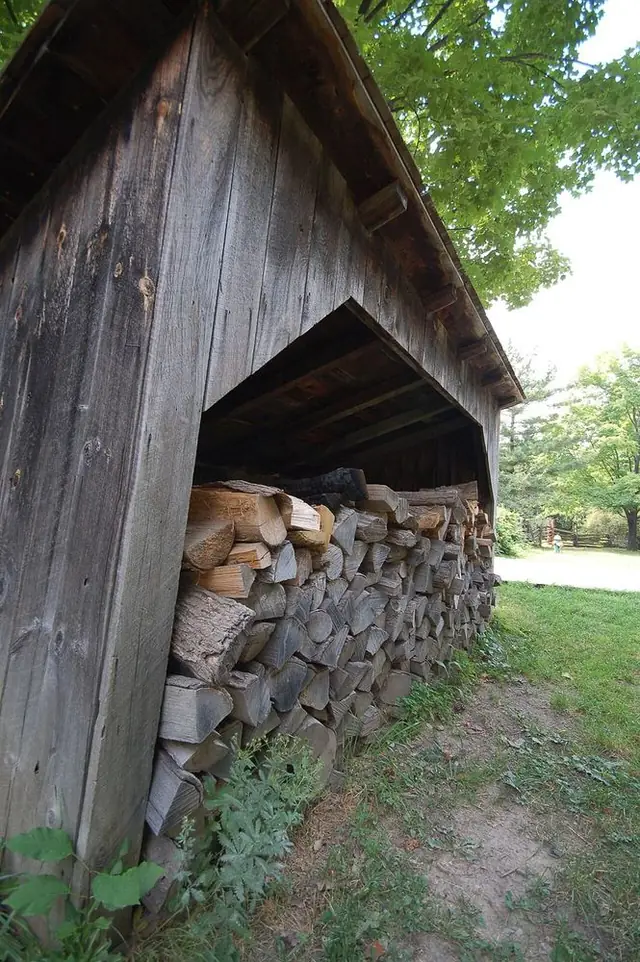
A firewood shed earns its place the first winter: dry wood lights easily, burns hot and leaves less soot in the chimney. This lean-to woodshed is built entirely from 2×4 lumber and 1×4 slats, stands on concrete blocks and holds about two face cords of 16 in (40 cm) logs. It is the step up from a small log store, with a full cut list so you can buy exactly what you need.
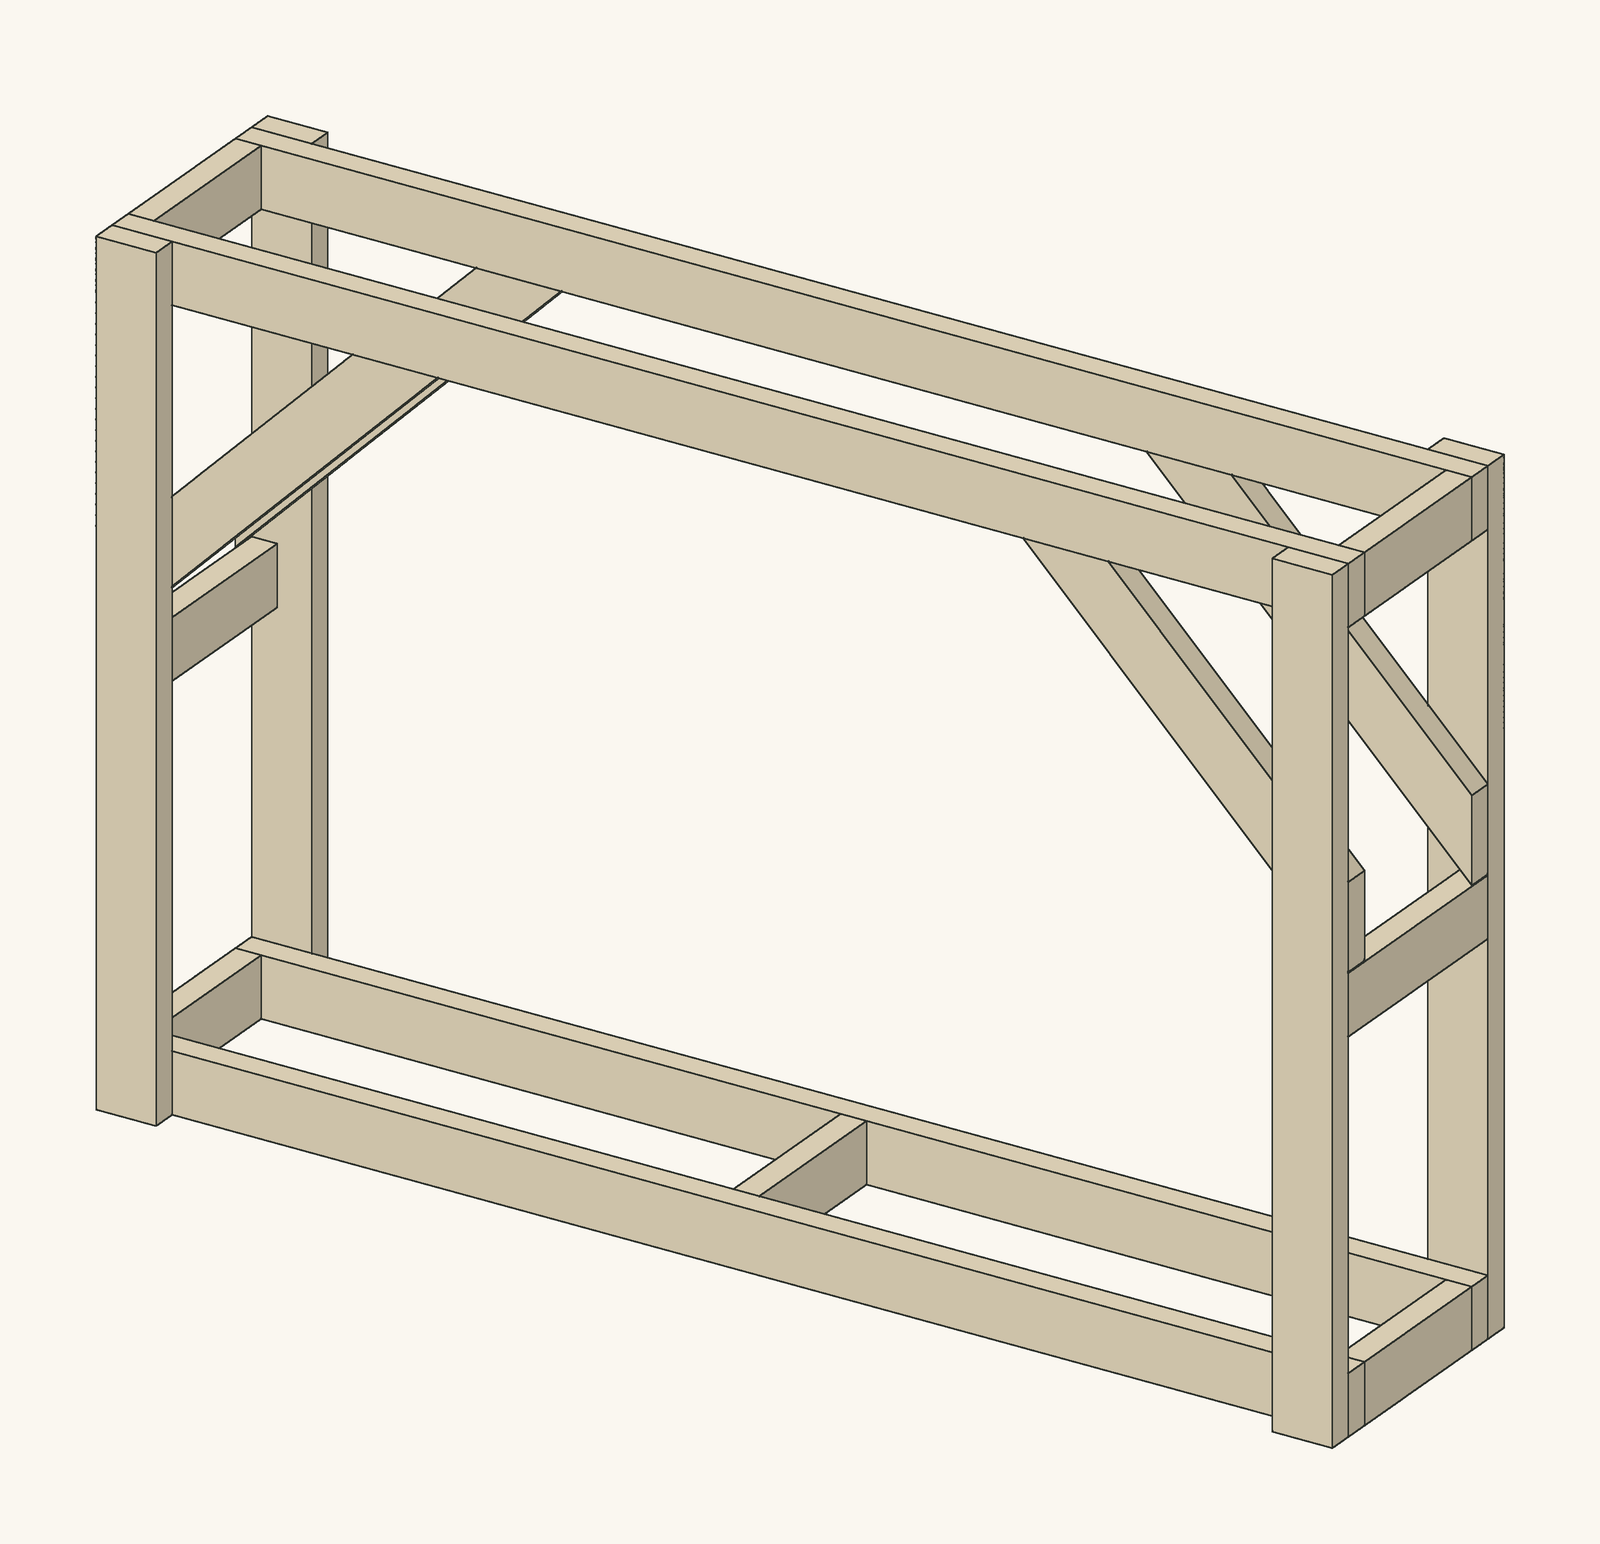
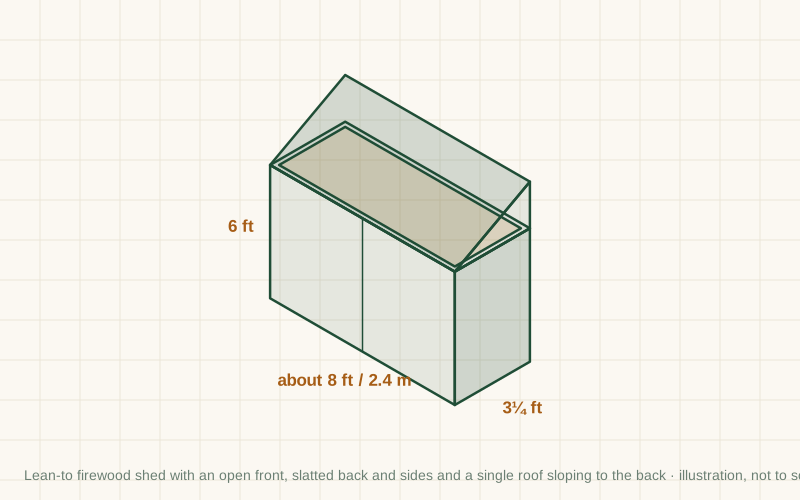
A rectangular floor frame of 2×4s, 8 ft (2.4 m) long and 3 ft (91 cm) deep, sits on six concrete blocks. The logs rest on crosspieces with open gaps between them, so air rises through the stack. Three posts stand at the front and three at the back; the front ones are 12 in (30 cm) taller, which gives the single roof its slope to the back. Five rafters carry three purlins and corrugated roofing panels that overhang on every side.
The back and sides are clad with 1×4 slats spaced 2 in (5 cm) apart, which keeps driving rain off the wood but lets wind blow through, and the front is open for stacking. Wood needs moving air more than it needs shelter, so the open front faces the prevailing wind or at least an open part of the garden, never a wall or a hedge. For a small store against a fence or for kindling, see the smaller covered log store guide instead.
Check your local rules. A woodshed of this size is permitted without an application in many places, but rules differ: some count any roofed structure as a building, limit its distance from the boundary or its height, or restrict firewood storage close to a house for fire safety. Check before you build, especially near a boundary.
Build it
Lumber sizes are North American nominal sizes: a 2×4 is actually 1½ × 3½ in (38 × 89 mm). Metric figures in brackets are converted or, for lumber, the nearest common European size (such as 45 × 95 mm), which works the same way.
| Part | Qty | Length | Section | Notes |
|---|---|---|---|---|
| Floor rails, front and back | 2 | 96 in (2438 mm) | 2×4 (1½ × 3½ in / 38 × 89 mm) | Pressure-treated, ground contact. Full length boards |
| Floor crosspieces | 7 | 33 in (838 mm) | 2×4 | Pressure-treated, ground contact. Between the rails at 16 in (40 cm) centres; three come from the back-post offcuts |
| Front posts | 3 | 72 in (1829 mm) | 2×4 | Pressure-treated. Left, middle and right |
| Back posts | 3 | 60 in (1524 mm) | 2×4 | Pressure-treated. 12 in (30 cm) shorter than the front posts |
| Top plates, front and back | 2 | 96 in (2438 mm) | 2×4 | Pressure-treated. Full length boards |
| Rafters | 5 | 54 in (1372 mm) | 2×4 | Pressure-treated. Trim the ends plumb after fitting |
| Purlins | 3 | 108 in (2743 mm) | 2×4 | Pressure-treated. From the 10 ft boards; 6 in (15 cm) overhang at each side |
| Corner braces | 2 | 22 in (559 mm) | 2×4 | Pressure-treated. 45° at both ends; from the front-post offcuts |
| Back slats | 10 | 96 in (2438 mm) | 1×4 (¾ × 3½ in / 19 × 89 mm) | Pressure-treated or larch. Full length boards |
| Side slats | 20 | 39 in (991 mm) | 1×4 (¾ × 3½ in / 19 × 89 mm) | Pressure-treated or larch. Two from each 8 ft board; check against your frame first |
Lengths are for the design in this guide. Measure your own pieces as you build and cut the last ones to fit.
| Item | Qty | Notes |
|---|---|---|
| 2×4 pressure-treated, 8 ft (2.4 m) | 17 | Rails 2, top plates 2, posts 6, rafters 5, crosspieces 2 (cut two from each) |
| 2×4 pressure-treated, 10 ft (3 m) | 3 | Purlins |
| 1×4 boards, 8 ft (2.4 m) | 20 | 10 for the back, 10 cut in two for the sides |
| Corrugated roofing panels about 26 in × 5 ft (0.66 × 1.5 m) | 5 | Each covers about 24 in (61 cm) after the side overlap |
| Concrete blocks or paving slabs | 6 | Corners and the middle of each rail |
| Structural screws 3 in (76 mm) | About 150 | Frame, posts, plates, rafters and purlins |
| Exterior screws 1⅝ in (41 mm) | About 160 | Two per slat end, plus spares |
| Roofing screws with washers | About 60 | The type the panel maker specifies |
Pick firm, well-drained ground with the open front facing an open part of the garden, at least 3 ft (1 m) from a house wall. Set six blocks in a rectangle about 8 ft by 3 ft (2.4 × 0.9 m): one at each corner and one in the middle of each long side. Dig them in until their tops are level with each other; check with a long straight board and the spirit level.
Lay the two 96 in (2.44 m) rails on edge on the blocks and fit the seven crosspieces between them, one at each end and the others at 16 in (40 cm) centres. Fix each crosspiece with two 3 in (76 mm) screws through the rail into its end. Measure both diagonals; when they are equal the frame is square.
Screw the three 72 in (1.83 m) front posts to the outside face of the front rail, at both ends and in the middle, with their bottoms flush with the underside of the rail. Fix the three 60 in (1.52 m) back posts to the back rail the same way. Use four screws per post and check each one for plumb in both directions before the last screw; clamp a temporary diagonal board across if it moves.
Screw a 96 in top plate across the inside faces of the front posts, flush with their tops, and the second one across the back posts. Then fix a corner brace at 45° inside each back corner, from the floor rail up to the corner post, to stop the frame racking sideways while you work on the roof.
Lay the five rafters across the top plates at 24 in (61 cm) centres, the outer two in line with the corner posts. Let each overhang about 6 in (15 cm) at the front and the back, and fix it with two 3 in screws angled down into each top plate, or with rafter ties. Mark a plumb line at each end and trim the ends so they look neat.
Screw the three 108 in (2.74 m) purlins flat across the rafters: one along the front ends, one in the middle and one along the back ends, each overhanging 6 in at both sides. Lay the roofing panels down the slope, starting at the end away from the prevailing wind so each overlap faces away from it, and fix them through the crowns with the roofing screws as the maker specifies.
Screw the ten 96 in back slats horizontally across the outside of the back posts, starting with the lowest slat flush with the bottom of the floor rail. Use a 2 in (5 cm) spacer block between rows and two screws into each post. The top slat should end a little below the top plate.
Measure across each side from the outer face of the front post to the outer face of the back post, cut the side slats to fit, about 39 in (99 cm), and fix them with the same 2 in gaps. Sand any splintered edges, seal the cut ends of the treated wood, and wait until the shed is finished before you stack wood in it.
General guidance only. Follow the instructions for your tools and materials and your local rules, and use a qualified professional for electrical, gas and structural work.
More detail
Background for planning and adapting the build: sizes, variations, materials and fixes.
The floor inside the frame is 96 in by 36 in (2.44 × 0.91 m). Two rows of 16 in (40 cm) logs stacked about 4 ft (1.2 m) high fill it comfortably while leaving air above the stack and behind it.
| Measure | Imperial | Metric |
|---|---|---|
| Stack length | 8 ft | 2.4 m |
| Stack depth, two rows of 16 in logs | 32 in | 81 cm |
| Stack height | 4 ft | 1.2 m |
| Stacked volume | About 85 ft³ | About 2.4 m³ |
| In firewood units | About 2 face cords, two-thirds of a full cord | About 2.4 stacked cubic metres |
A full cord is 4 × 4 × 8 ft (128 ft³, about 3.6 m³) of stacked wood; a face cord is one row of logs 4 ft high and 8 ft long.
Freshly split wood holds a lot of water, often half its weight. It dries through the cut ends and the split faces, and it only dries when moving air carries the moisture away. A shed that keeps the rain off but stops the wind, such as one with solid walls or one placed in a sheltered corner, keeps the wood wet for much longer than an open stack would.
That is why this design uses a slatted back and sides with 2 in gaps, an open front and a floor of crosspieces with open spaces between them. Air enters under the floor, rises through the stack and leaves through the gaps and the open front. If your site is very exposed to driving rain from one side, close the gaps on that side only, or hang a breathable shade cloth on the inside of the slats in winter.
The best place is a firm, slightly raised spot with sun on the front for part of the day and nothing blocking the wind. Keep the shed at least 3 ft (1 m) from a house wall; many fire services advise more for large stacks, and woodboring insects that come in with logs should stay outside. Make sure you can reach the front with a wheelbarrow or a cart, because you will fill the shed with several hundred kilograms of wood each year. Check that the roof water runs off away from paths and the house.
Corrugated metal is cheap, quick to fit and lasts for decades; it is noisy in heavy rain, which rarely matters for a woodshed. Clear or opal polycarbonate panels let light in, which makes it easier to see the back of the stack in winter, but they become brittle after many years in strong sun. Roofing felt on plywood or boards looks more traditional and suits a shed near the house, but it needs a solid deck on the rafters and more work. Whatever you choose, keep the overhang at the front: the front of the stack is the wood you burn first.
For a 6 ft (1.8 m) shed, shorten the rails, top plates and back slats to 72 in, use five crosspieces and four rafters, and buy four roofing panels; it then holds about one and a half face cords. For a longer shed, add a post at the front and back and two more crosspieces for every extra 4 ft (1.2 m), and use longer boards for the rails and top plates, joining them over a post. Keep the depth at 3 ft unless you burn longer logs; a deeper shed holds more but dries the middle of the stack more slowly.
Each autumn, check that the shed still stands level on its blocks, re-tighten any loose roofing screws and clear leaves from the roof and from under the floor. Empty the shed fully once a year if you can, so no old wood rots in the back corners, and sweep out bark and debris before refilling it.
Big enough for one winter's wood plus a little extra. Many households with a wood stove for heating burn two to four face cords a winter; this 8 ft shed holds about two, so build two side by side or make it longer if you burn more.
Face the open front toward the prevailing wind or at least toward open space, never against a wall or a hedge. Moving air through the open front dries the wood; rain is kept off by the roof overhang.
No. Slats with gaps are better than solid walls. Solid walls keep rain out but trap damp air, so the wood dries more slowly. Gaps of about 2 in (5 cm) are a good balance.
Most split hardwood needs six months to a year, softwood a little less. A moisture meter on a freshly split face should read below about 20% before you burn the wood.
You can stack on pallets instead, but a raised floor of crosspieces is better: it keeps the bottom layer out of wet ground and lets air rise through the stack. Never stack firewood straight on soil or concrete.
It depends on where you live. Small open sheds like this are often allowed without an application, but rules on height, floor area and distance from the boundary vary. Check before you build.
Once the shed is up, fill it in spring and summer and let the wind do the work. Most hardwood needs six months to a year of airy storage after splitting before it burns well; a cheap moisture meter tells you when a split face reads below about 20%. Check the roofing screws and the blocks every autumn, and the shed will keep your winter wood dry for many years.
About this guide: published by Oskar N. and drafted with AI assistance from general, widely used building and gardening practice; see our editorial policy. Text and illustration © DIY Outdoor Builds. Found an error? Let us know.
Share your photos, measurements and what you changed. Your build gets its own page and helps the next person.
What others made, with their own photos and notes.
From diyoutdoorbuilds.com/guides/lean-to-firewood-storage-shed · DIY Outdoor Builds