 Guide
Garden Sheds
GuideStep-by-step plan written by our editors, with materials, tools and every step in order.
A shed lasts far longer on a firm, level and free-draining base. A pad of compacted crushed stone held in a timber frame is one of the most popular choices for small garden sheds: water drains straight through, the floor stays off wet soil, and you can build it with hand tools in a weekend.
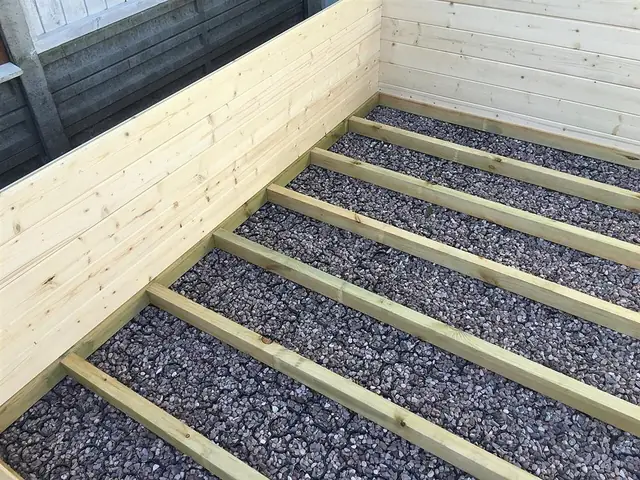
You will mark out a rectangle about a foot (30 cm) larger than the shed on every side, strip the turf and topsoil, build a level frame of ground-contact treated timber, lay a woven weed membrane, and fill the frame with crushed stone in layers, compacting each one. The shed then stands on its own floor bearers on top of the stone.
Crushed angular stone locks together when it is compacted; round pea gravel does not, so it rolls and shifts under load. Most guides recommend about 4–6 in (10–15 cm) of compacted stone for a typical garden shed, and more on soft clay or wet ground.
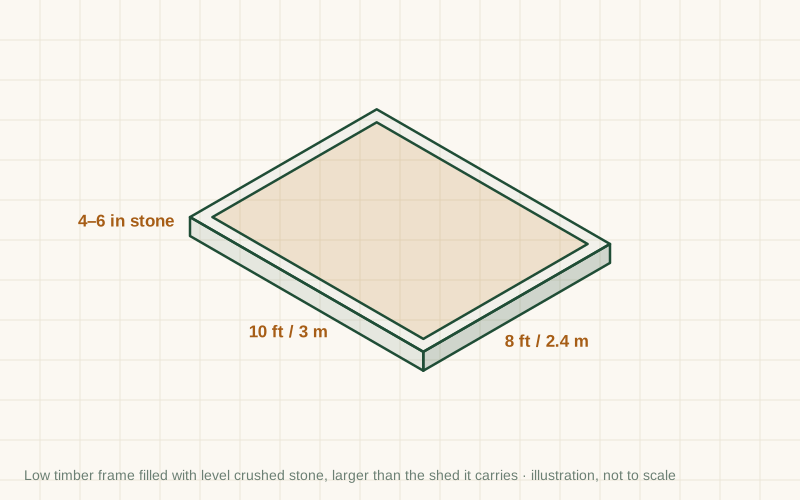
Make the pad about 12 in (30 cm) larger than the shed on each side, so a shed of 8 × 6 ft (2.4 × 1.8 m) gets a pad of 10 × 8 ft (3.0 × 2.4 m). The extra width keeps rain splash off the walls and gives you a dry strip to stand on. For the stone, multiply length × width × depth: a 10 × 8 ft pad at 4 in deep needs about 27 cubic feet, roughly 1 cubic yard (0.76 m³); order 10–20% more because it compacts. Larger sheds, sheds with heavy contents and workshops may need a concrete slab or proper footings instead, so check the shed maker's instructions.
Build it
Lumber sizes are North American nominal sizes: a 2×4 is actually 1½ × 3½ in (38 × 89 mm). Metric figures in brackets are converted or, for lumber, the nearest common European size (such as 45 × 95 mm), which works the same way.
Check local rules on shed size, height and distance from the boundary before you dig. Choose firm, reasonably flat ground away from tree roots and low spots where water collects, with room to reach every wall of the shed for painting and repairs.
Mark the rectangle with pegs and string about 12 in (30 cm) larger than the shed on each side. Measure both diagonals; when they are equal, the rectangle is square. Paint or cut along the string so the outline stays after you take it down.
Remove the turf and soft topsoil inside the outline, usually 2–4 in (5–10 cm), down to firm subsoil. Rake the bottom roughly level and tread or tamp down any soft patches. Keep the turf for patching bare spots elsewhere in the garden.
Cut the treated timber to the outline and screw the corners together. Set the frame in the trench, check that the diagonals still match, and level it all round with a long level, digging out under high spots rather than packing soil under low ones. Drive stakes on the outside and screw them to the frame.
Lay heavy-duty woven landscape fabric inside the frame, running it up the inside faces of the timber, and overlap any joins by at least 12 in (30 cm). The fabric keeps weeds down and stops the stone being pushed into the soil below.
Barrow in crushed stone and spread it about 2 in (5 cm) deep, then compact it with a plate compactor or hand tamper until you can walk on it without leaving footprints. Repeat with a second layer, and a third on soft ground, until the stone is level with the top of the frame.
Drag a straight board across the frame like a screed, filling low spots and taking off high ones, and check with the level in several directions. Give it a final pass with the compactor. The surface should be firm and level enough that a marble barely rolls.
Most shed floors sit on treated bearers that run under the floor. Lay them on the stone at the spacing the shed maker gives, check they are level, and assemble the shed on them. The bearers keep the floor clear of the stone so air can move underneath.
General guidance only. Follow the instructions for your tools and materials and your local rules, and use a qualified professional for electrical, gas and structural work.
A well-built gravel base drains freely and keeps the shed floor dry for decades. Rake the surface around the shed now and then, top up any thin edges with spare stone, and keep plants from growing against the walls so air can circulate.
About this guide: published by Oskar N. and drafted with AI assistance from general, widely used building and gardening practice; see our editorial policy. Text and illustration © DIY Outdoor Builds. Found an error? Let us know.
Share your photos, measurements and what you changed. Your build gets its own page and helps the next person.
What others made, with their own photos and notes.
 Our design
Greenhouses
 Our design
Outdoor Structures
 Real build
Greenhouses
 Real build
Outdoor Structures
From diyoutdoorbuilds.com/guides/gravel-shed-base-with-timber-frame · DIY Outdoor Builds